

To keep your patio in good condition and extend the life of its finish, cleaning is a must. However, not all patios are cleaned the same way. A wood patio, a fiberglass balcony, or a concrete terrace require methods and products suited to their material.
Cleaning can also vary depending on the type of finish used to protect the surface. An oil, a stain, or a sealer will not necessarily react the same way to cleaning products or pressure washing.
Would you like to know how to clean your patio without damaging its surface or finish? Here are our tips and advice to help you do it properly.
01
Check these two things before cleaning your patio
To know how to clean your patio without damaging it, you must first take two important factors into account.
What material is your patio made of?
As you might expect, a concrete patio does not react to cleaning products the same way a wood patio does. Some products that are perfectly suitable for concrete can be too harsh for wood, and the reverse is also true.
Your patio’s material will therefore determine the preferred cleaning method and the type of product to use.
Has your patio already been finished?
You must also check whether the surface has been protected with a stain, paint, epoxy, sealer, or another finishing product.
The goal is to clean your patio, not accidentally strip its finish! A cleaner that is too strong can attack or alter certain coatings. The choice of cleaner and how you use it must therefore also take the finish already on your patio into account.
02
Maintenance tasks to do throughout the year for your patio
Before getting into the cleaning methods specific to each type of patio and finish, let’s first look at a few good habits that can help slow down wear on the surface and its finish.
These small maintenance steps are useful regardless of your patio’s material. They help limit the buildup of dirt and contaminants and, above all, prevent the surface from deteriorating unnecessarily over time.
-
Clear snow from your patio during the winter

During the winter, it is best to clear snow from your patio regularly to prevent it from building up in large amounts. A significant buildup can put a lot of weight on the structure and, in some cases, cause damage. This is particularly important for patios with a wood structure.
Snow removal also helps preserve your patio’s finish. When the snow melts in spring, all that water is absorbed by the surface. The more snow that has accumulated, the more water will come into contact with the patio. This can increase the risk of peeling, flaking, or premature wear of paint or stain.
Could you not clear snow often during the winter? That is not a reason to let all that snow melt on your patio. Do a thorough snow removal at the beginning of spring, ideally before the major thaw. This will help limit the amount of water that accumulates on your patio and reduce the stress that this can put on its structure and finish.
-
Maintain your gutters
If a gutter or water drainage system is located above your patio, it is in your best interest to make sure it is working properly. A clogged gutter can overflow directly onto the patio and create a buildup of water and moisture on the surface. And where there is standing water, there is a risk of flaking. In addition, moisture caused by poor drainage or a dripping gutter can encourage mould growth and speed up deterioration of the finish and even the structure.
Before winter arrives, take a few minutes to check that there are no leaves, debris, or other dirt that could prevent water from draining properly.
You should also monitor the condition of the gutter itself. If it starts to rust, dripping water can carry rust particles onto the patio and leave orange or brownish stains that are difficult to remove.
A good gutter cleaning at the end of autumn is therefore a small maintenance task that can save you a lot of trouble in spring.
-
Maintain the vegetation around the patio
If your patio is surrounded by shrubs, trees, or other plants, a bit of maintenance before winter can help keep it in good condition. Branches and leaves that fall and accumulate on the surface can trap moisture all winter and encourage mould growth in spring. They will also decompose and leave stubborn stains on your patio.
To avoid these problems, take the time to trim the vegetation near the patio. The goal is to keep some distance between plants and the surface to limit the amount of leaves, branches, and debris that accumulate there.
It is a small step that takes little effort and can make spring cleaning easier.
-
Store your patio furniture during the winter
If you have furniture on your patio or deck, putting it away before winter is a good habit to adopt. It obviously protects your furniture from the elements, but it also helps preserve your patio surface.
When a table, chair, or other piece of furniture stays in the same spot for several months (especially during winter), the finish can wear unevenly, particularly on wood patios and decks coated with stain.
When spring arrives, you may end up with lighter areas where there has been more wear and darker areas where the furniture was. Put your furniture away before winter, if you want to avoid having to repaint or re-stain to restore a uniform look.
-
Make repairs to your patio when needed

Summer is the ideal time to carry out any necessary repairs on your patio. If you notice a broken board, crumbling concrete, or a structural issue, it is best to address it before bad weather arrives.
A small issue may seem harmless at first, but it can worsen over time. Moisture, freezing temperatures, and winter freeze–thaw cycles can notably accelerate the deterioration of certain materials.
Taking the time to make repairs while conditions are favourable can therefore help you avoid much bigger problems in spring.
03
Cleaning your patio
Now that we have covered the small maintenance tasks you can do throughout the year, let’s look at how to handle the actual cleaning.
When should you clean your patio?
Regardless of your patio’s material, a thorough spring cleaning is essential to remove dirt and residue that built up over the winter. As it melts, snow leaves behind various debris that can stain or damage certain surfaces, especially wood and concrete.
If possible, another cleaning at the end of summer or in autumn is also a good idea. This way, you can remove leaves, dirt, and other contaminants before winter arrives, and leave your patio in good condition to face the cold season.
Before cleaning the patio…
Remember to protect nearby plants and shrubs! Even eco-friendly cleaning products can irritate vegetation or cause damage.
To limit the risks, water the plants thoroughly before you start cleaning. Moistening the leaves and soil helps dilute any cleaner splashes and reduces the risk of damage. For extra protection, you can also cover the vegetation with painter’s drop cloths or plastic protective tarps.
Once cleaning is complete, remove the coverings and rinse the plants with clean water if they were splashed.
04
Cleaning a wood patio

Wood is a very popular material for building patios and decks in Quebec. Warm, attractive, and durable, it fits easily into many landscaping styles. However, it requires a bit more attention than other materials, especially when exposed to the elements. Regular cleaning, with the right products, is therefore essential to keep it in good condition.
Cleaning a wood patio helps remove mould that develops on the surface of the boards, built-up dirt, and greying marks caused by sun and weather. So it is not only about appearance: proper maintenance also helps preserve the wood and limit its deterioration.
However, before choosing a cleaner, you must consider the finish already applied to the wood. Most patios are protected by a stain or an oil, while some are coated with paint. The product and cleaning method must be suited to that finish to clean effectively without damaging it.
-
Stained or oiled wood patio
Exterior stains and oils are designed to penetrate the wood’s pores rather than simply forming a film on the surface. This is especially true for semi-transparent stains and natural oils. This is notably what keeps much of the wood grain visible after application.
Another characteristic: penetrating stains and oils generally tend to wear gradually rather than flake. Their maintenance and cleaning therefore require a different approach than a surface coated with paint or a film-forming finish.
What does this mean when it is time to clean the patio?
The goal of cleaning is to remove dirt, mould, and other contaminants that have built up on the wood surface, without removing the finish that protects it. You therefore need to avoid overly aggressive cleaners that could attack the stain or oil.
Most manufacturers of exterior wood finishing products also offer their own cleaners. This is particularly useful with natural oils, since using the manufacturer’s recommended cleaner helps reduce the risk of incompatibility and premature deterioration of the finish.
Refer to this table to find out which cleaner to use based on your stain or oil:
| Stain or oil | Recommended cleaner |
|---|---|
| Sansin DEC | Multi-Wash or Sansin Wood Wash |
| Steina Oil | Passeport Elite Deck Cleaner |
| Alis by Livos | Glouros by Livos |
| Extéria by Ligna | Extrolia Cleaner or Glouros |
| Osmo Decking Oil | Osmo Wood Deck Cleaner |
| Cetol stain | Passeport Elite Deck Cleaner or Sansin Multi-Wash |
Cleaning your patio with Multi-Wash
Would you like to know how to do it, step by step? Read this article!

Maintaining a patio stained with Sansin DEC stain
-
Painted wood patio
What is the difference between a stained patio and a painted patio (or one coated with an opaque stain)? Paint and opaque stains hide the wood grain more, since they form a more opaque layer on the surface. The grain and natural texture of the wood therefore become barely visible or not visible at all. However, this layer may be more likely to flake if moisture gets under the finish or if it loses adhesion.
Before cleaning a painted wood patio, you must therefore check the condition of the finish.
Is the paint or opaque stain still in good condition?
If the finish is not flaking and the patio is simply dirty or slightly blackened, a surface cleaning should be enough. Sansin Multi-Wash is an interesting option for removing dirt and mould marks without damaging a finish that is in good condition, provided you follow the product’s instructions.
For cleaning, you can follow the same procedure as for a stained wood patio, taking care not to use excessive pressure that could damage the finish.
Is the patio finish flaking?
This is a fairly common issue on painted wood patios, especially those that are close to the ground and more exposed to moisture. If the paint is flaking, a simple cleaning will not be enough to solve the problem. To restore a uniform surface and ensure good adhesion of the new finish, you must remove the areas that are no longer adhering properly and assess the condition of the coating across the entire patio.
You can use an exterior wood stripper to make it easier to remove the old stain. Since wood is porous and paint can penetrate its irregularities, several applications may be necessary to remove enough product.
Once stripping is complete, follow the manufacturer’s recommendations to clean off residue and let the wood dry. You will then need to sand the surface to remove flaking stain, even out the wood, and prepare it for a new finish.
Can I use a pressure washer on my wood patio?

Yes, but it must be used carefully to avoid damaging the wood. Pressure should not exceed 500 psi, and it is best to use a nozzle that widens the spray. A jet that is too concentrated can gouge the wood, lift its fibres, or leave permanent marks.
When cleaning your patio, avoid holding the spray in the same spot for too long. Instead, keep the nozzle moving constantly to distribute pressure over the surface.
You should also keep a distance of about 12 to 18 inches between the nozzle and the wood. The closer you bring the nozzle, the more pressure is applied to the wood. Take the time to find the right distance and always start with moderate pressure.
05
Cleaning a fiberglass patio
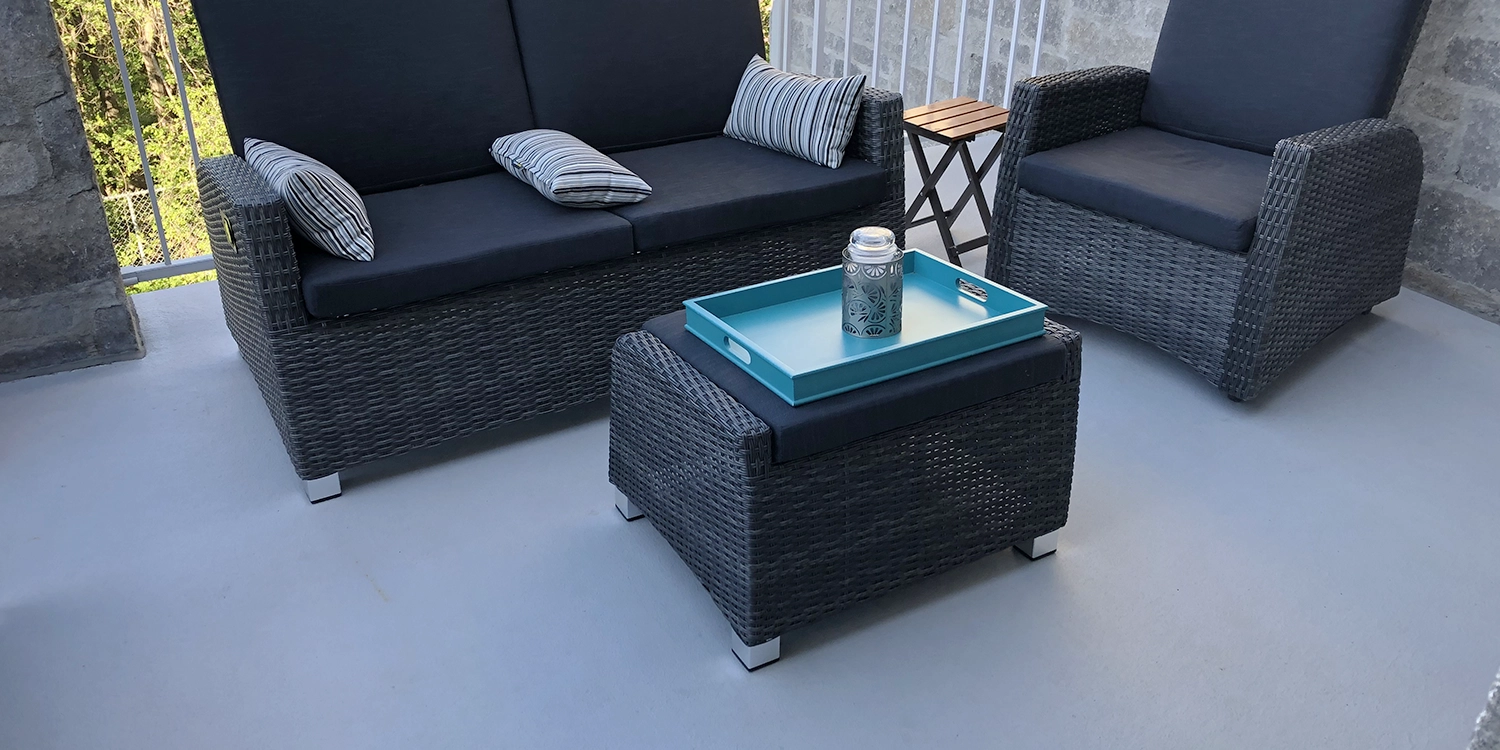
Fiberglass is a strong material that is relatively easy to maintain. It still requires regular cleaning, especially if your balcony or patio is older. Over time, dirt and moisture can encourage mould stains. The problem is even greater if the surface is cracked, since moisture can seep into the damage.
For routine maintenance, use a mild soap and a nylon brush. Avoid metal-bristle brushes, which can permanently scratch the surface.
If your balcony has stubborn stains, PTS (TSP) degreasing cleaner can be an interesting option.
- First, test a small, inconspicuous area to make sure the fiberglass does not react to the cleaner
- Dilute the product according to the instructions, then scrub stained areas with a nylon brush.
- Once cleaning is complete, you can rinse or mop with a damp mop.
Cleaning fiberglass: watch out for solvents and rust
Even though fiberglass is durable, certain solvents can damage its surface or the coating that protects it. To avoid unpleasant surprises, use mild cleaners and always check compatibility before using them.
Rust also deserves special attention. Metal objects left on the balcony can leave orange or brownish stains, sometimes difficult to remove. To limit this risk, avoid leaving objects that can rust on the surface, especially during winter.
If rust stains appear, use a product designed to treat rust. Check that it will not cause issues for the fiberglass and its finish. Follow the manufacturer’s instructions and test a small, less visible area. Avoid products containing strong solvents or improvised mixtures, which could damage the surface rather than clean it.
06
Cleaning a concrete patio
The same applies if you are about to clean a concrete patio: take the condition and finish of the surface into account. Concrete that has been treated with a sealer or polished will generally be easier to clean and less likely to stain.
Conversely, unfinished, raw concrete is more porous and will be more sensitive to the spray from a pressure washer. In that case, avoid using excessive pressure and choose a nozzle that widens the spray. Also keep a reasonable distance between the nozzle and the surface to avoid marking or damaging the concrete.
Before cleaning the entire patio, always test a less visible area. This will allow you to see how the concrete reacts to pressure and the cleaning product before you continue.
Cleaning dirt embedded in concrete
If your goal is to remove dirt embedded in the concrete, Sansin Multi-Wash is an interesting option. You can adjust its dilution based on how severe the stains are, to tailor the cleaning to your patio’s condition.
Krud Kutter is another solution that is particularly effective for cleaning concrete. In addition to loosening stubborn dirt, it helps neutralize efflorescence, those whitish deposits that can appear on the surface of concrete when mineral salts rise with moisture.
Multi-Wash and Krud Kutter are both water-based cleaners and are also biodegradable. This makes them a practical option for preparing your concrete patio before other maintenance work.
Cleaning your concrete patio with Krud Kutter

You will see, it is very simple:
- Start by diluting Krud Kutter using a ratio of 6 parts water to 1 part cleaner. If you have stains that are deeply embedded in the concrete, you can also use it undiluted.
- Apply the solution to the surface with a sprayer or a roller.
- Scrub the concrete with a nylon brush to activate the cleaner and loosen stains.
- Let Krud Kutter work for 3 to 5 min.
- Rinse with a garden hose or a pressure washer.
That is it—job done! All you have to do is wait for your concrete to dry properly.
Do you have oil stains that are deeply embedded in the concrete?
Oil stains can be very difficult to remove when they seep in deeply. Fortunately, there are cleaners designed specifically for this type of damage.
How to use Oil Grabber.
- Pour Oil Grabber directly onto the stain. You want to cover the entire stain, extending about one inch all around.
- Let Oil Grabber work for 5 to 8 hours. As it dries, it will form a fine powder on the concrete surface. Do not worry—this is normal.
- Vacuum up the powder, then rinse thoroughly with water.
- If the stain is still there, you can repeat the same steps a second time.
Start your project now!
You will find all the products you need directly on our website.
- Assess the condition of your patio.
- See which cleaner is best suited to your patio’s material and the nature of the stains and contaminants on it.
- Place your order online and choose between in-store pickup and home delivery.
Would you like to learn more about maintaining outdoor surfaces? Visit the section of our blog dedicated to this topic!
Products found in this article.

Sansin Multi-Wash Cleaner

Krud Kutter Cleaner

Glouros Cleaner for wood and masonry
Q&A
Q. What should I do if white marks appear on my concrete patio after cleaning?
Whitish marks on concrete can be caused by efflorescence—mineral salt deposits that rise to the surface with moisture. If they persist after cleaning, you should identify the source before using a stronger product. A concrete-specific cleaner, such as Krud Kutter, can help neutralize these deposits. However, make sure it is suitable for your patio’s finish if the concrete has been treated.
Q. Why does my wood patio stay grey or blackened despite cleaning?
Greying and blackening can be caused by embedded mould, stubborn dirt, or greying related to exposure to sun and weather. A standard cleaner will not necessarily correct all of these issues. If the wood remains blackened after cleaning, check whether the marks are superficial or whether they seem to penetrate the wood. Avoid repeating cleaner applications without knowing the cause, as you may damage the finish.
Q. What should I do if my patio finish starts to flake after cleaning?
If paint or opaque stain is flaking, the issue does not necessarily come from cleaning. Moisture, poor adhesion, or insufficient preparation during application may also be the cause. In that case, avoid continuing to clean with a pressure washer. You will need to remove the areas that no longer adhere, determine why the finish is peeling, and properly prepare the surface before applying a new coating.
Q. Can you clean a patio with bleach to remove mould?
It is not always the best choice. Bleach can discolour certain surfaces and damage some finishes. Before using it, check compatibility with your patio’s material and coating. A cleaner designed for the type of surface you want to treat is generally preferable. Also avoid mixing different cleaning products, as some combinations can release dangerous fumes.
Q. How do you remove an oil stain that has penetrated concrete?
An oil stain can be difficult to remove because concrete is porous and absorbs contaminants. A simple wash with soapy water is therefore unlikely to be enough. You can use a product designed for oil stains on concrete, such as Oil Grabber. This type of cleaner works directly on the stain and may require a second application if the oil has penetrated deeply into the concrete.
Q. How long should you wait after cleaning before applying a new stain to a wood patio?
The wood must be dry enough before applying a new stain. The timeframe depends on the weather, temperature, the stain you are using, and the wood species. After cleaning, generally allow at least 24 to 48 hours of drying time—sometimes longer depending on conditions. If you have a moisture meter, use it to check the wood’s moisture content and compare the result with the chosen stain manufacturer’s requirements. Applying a finish to wood that is still damp can reduce adhesion and durability.


