

Got an interior wood staining project? No matter what finish you’re planning to apply, the key to a smooth project and an exceptional result is flawless wood prep before applying stain, oil, or varnish.
For example, a small glue spot on new wood, even if you can barely see it, will really show once the stain is applied. Why? Because the stain won’t penetrate there, so it leaves a lighter spot.
On the flip side, a water mark—like a wet boot on raw wood—does the opposite. The wood will absorb more product in that area, and you’ll end up with a darker spot.
Bottom line: if you want a clean, even, truly professional result, you don’t have a choice—prep is not optional. Even if your wood is new, it’s worth taking the time to do it right. That way, you avoid nasty surprises!
01
Remove the old finish
If your surface is already varnished or painted, you don’t have a choice: you first need to remove the existing finish before starting over on a solid base.
To do that, you have three options:
- stripping (chemical),
- sanding,
- or a mix of both depending on the situation.
The goal is simple: get back to bare, even wood so your new product can penetrate properly and deliver a beautiful result.
When should you use a stripper?
A stripper is your best ally when you run into a finish that’s really hard to remove. Ultra-tough varnish, old stain that’s soaked in… instead of sanding forever, you apply the stripper and it softens the finish.
Your sanding will be much easier—and most importantly, you won’t feel like you’re working your arms off.
It’s also an excellent option if you’re working on a more fragile wood, like plywood. In that case, sanding too aggressively can go right through fast. A stripper lets you do the heavy lifting without risking damage to the surface.
But there’s one thing you need to know: a stripper doesn’t open the wood pores the way sanding does. So even if you’ve removed the old finish, your wood still isn’t quite ready for a new coat of wood stain or oil.
That’s why stripping never fully replaces sanding. Ideally, do a light sanding afterward to open up the wood and let your finish penetrate properly.
How do you apply stripper?
Each finish will react differently to the stripper, so it’s hard to predict the effect it will have. The time you need to let the stripper work can vary from one project to another.
- Before you start, make sure the room you’re working in is well ventilated.
- Pour the stripper directly onto the surface you’re stripping, then spread it with a natural bristle brush. Use an inexpensive brush, since you’ll probably have to throw it out afterward.
- Let the stripper work for at least 15 minutes. On a particularly stubborn varnish or paint, you may need to wait longer. In the meantime, you can scrub the surface with a stripping pad to boost the stripper’s abrasive effect.
- Use a scraper to peel off the old finish. Remove residue with a stripping pad.
- If there’s still a lot of the old finish left on the surface, you can repeat these steps again.
- When you’re done stripping, you need to neutralize any stripper residue. To do that, wipe the boards you just stripped with a cloth soaked in methyl hydrate (wood alcohol). The alcohol evaporates in a few seconds, and you can continue prepping your wood.
How do you apply a stripper?
Each finish reacts differently, so expect to adjust a bit as you go. There’s no magic recipe: how long you need to let the stripper work will vary depending on the finish you’re removing.
- Before you start, make sure your space is well ventilated. That’s the basics.
- Pour the stripper directly onto the surface, then spread it with a natural bristle brush. Don’t go too expensive, because there’s a good chance it’ll end up in the trash afterward.
- Let it work for at least 15 minutes. If you’re working on an old varnish or really stubborn paint, it can take longer. During that time, you can use a stripping pad to give the product a little boost.
- When the finish starts to lift, use a scraper to remove it, then clean up the residue with your pad. If there’s still some left, you can simply repeat the process.
- Once everything is removed, there’s one important step left: neutralize the stripper. Wipe the surface with a cloth soaked in wood alcohol (methyl hydrate). It evaporates quickly and lets you start again on a clean base for the rest of your prep.
Do you need to sand even when the wood is new?
Yes, it’s important to sand, both new boards and old ones.
Sanding isn’t just about “making it look nice.” It also (and especially) helps prep your wood properly so stain or oil penetrates evenly.
In practical terms, it helps remove contaminants like glue residue or pore filler, open the wood grain, and even out absorption. In short, you make sure your finish soaks in the same way everywhere.
A super common mistake: thinking new wood doesn’t need sanding. On the contrary—that’s when it matters most.
Why? Because of what’s called mill glaze (or machining glaze). When wood is planed at the factory, the blades spin so fast they heat up the surface. That ends up sealing the wood surface, almost like it already has a thin protective layer.
If you don’t sand, your stain won’t penetrate properly… and you risk ending up with an uneven or disappointing result.
So even on new wood, good sanding is mandatory if you want a finish that looks premium.
02
Choosing the right sandpaper
The basic principles for choosing your sandpaper grit are pretty simple;
- The coarser the grit, the more you open the wood. So the stain will penetrate more… and your colour will come out darker.
- On the flip side, the finer the grit, the more you close the wood. The stain penetrates less and the result will be lighter.
Bottom line: your sandpaper choice directly affects your final result. It’s not just about texture—it’s also about colour.

In general, for hardwoods like maple, oak, or birch, you’ll mostly work with 80, 100, and 120 grits. For softer woods like pine, you’ll use a finer grit: 150. In short:
- Oak: 100/120
- Birch and maple: 120
- Pine and softwoods: 150
But beware: the grit choice will also change depending on two other factors: how intense you want the colour to be and the tool you’re using to sand.
Method-wise, if you can, go with an orbital sander. It’s the safest tool for getting an even sand with no marks or streaks. It spins fast, so the result is clean and consistent.
You can also sand with an oscillating sander or even by hand with a sanding block, but it takes a bit more control to avoid marks.
An orbital sander is faster, but also less aggressive than other methods. So to get an equivalent result, you need to adjust your sandpaper grit:
- Orbital: 100
- Oscillating: 120
- By hand: 150
IMPORTANT:
Do a colour test before you commit for real. Find a small, less visible area, sand as planned, then apply a bit of your stain (or finish). Let it dry properly—minutes or hours depending on the product—then check the result. It’s the best way to confirm that your sanding grit and your colour give you the result you want… and save yourself a lot of nasty surprises later on
03
How to sand properly

When you sand, take it easy. No need to press too hard on the sander: let the tool do the work.
Make sure you always follow the wood grain to avoid cross-grain marks or sanding against the grain.
Why is it so important? Because stain will highlight everything in your wood… the good and the flaws. If you sand against the grain, you risk leaving streaks that will become super visible once the finish is applied.
Once your sanding is done, take the time to thoroughly remove dust from the surface. Vacuum, then use a dry cloth to remove residue.
Avoid tack cloths. They can leave a slightly sticky film on the wood, which can interfere with stain penetration.
04
Wipe down the surface
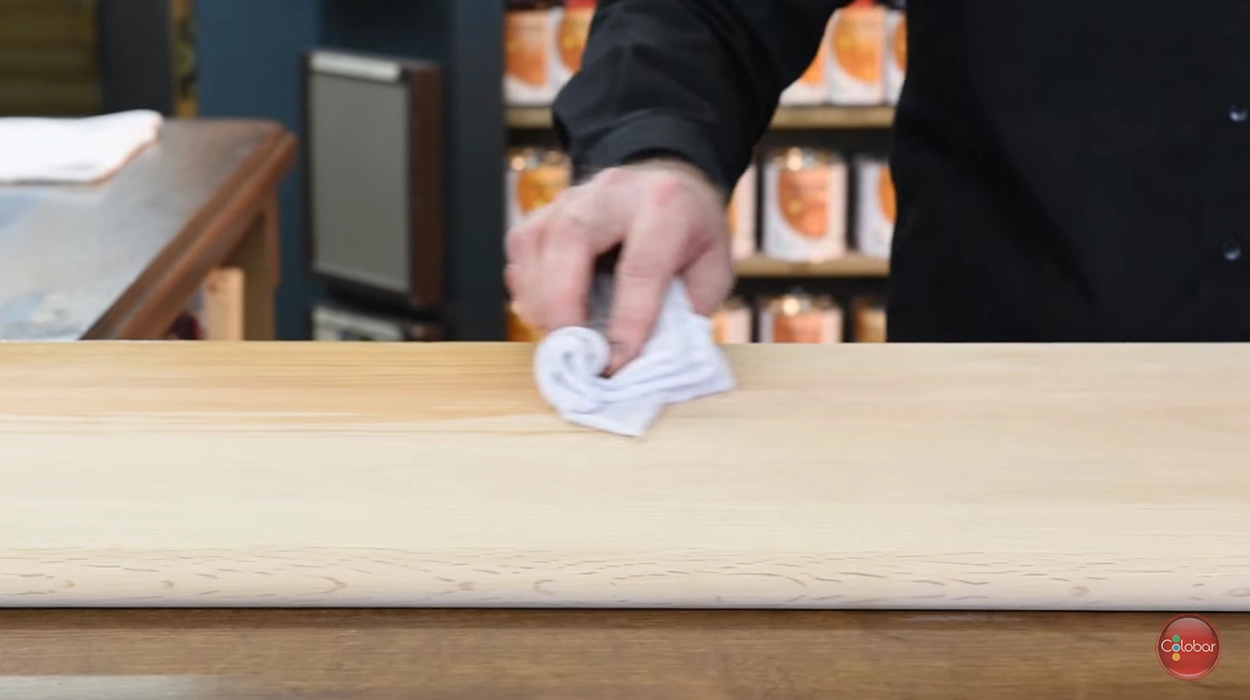
Sometimes, even with good sanding, the wood—especially hardwoods—doesn’t open its grain enough to reach the colour you want.
In that case, you can give it a little boost by wiping the surface with a cloth dampened with wood alcohol (methanol) or simply water.
The alcohol will slightly open the grain, just enough to give you a colour about 25% darker. Its big advantage: it evaporates super fast. In just a few minutes, you’re ready to apply your stain.
With water, you take it up a notch. It opens the wood even more—so much that you can even feel a slight roughness to the touch. Result: the stain penetrates more and you can get an even richer colour—about 50% darker than wood that hasn’t been dampened.
But take your time: after wiping down with water, let it dry at least 30 minutes before applying your stain.
The two samples you see on the panel were made with exactly the same colour.
The difference? The prep.
The lighter one was wiped with wood alcohol (methyl hydrate), while the darker one was dampened with water.
Same stain, two completely different results—just because of how the wood was prepped.
IMPORTANT:
Do a colour test before you start on the whole surface. Find a small, less visible area, sand as planned, then apply a bit of your stain (or finish). Let it dry properly—minutes or hours depending on the product—then check the result. It’s the best way to confirm that your sanding grit and your colour give you the result you want… and save yourself a lot of nasty surprises later on
Start your project now!
You’ll find everything you need directly on our website. Ask yourself these questions to figure out what you’ll need:
- Is there a varnish or old finish that’s particularly hard to remove? If so, you may need a stripper.
- Which sanding method do you want to use?
- For an orbital sander, use disc sandpaper.
- For a sanding block, you’ll need sheet sandpaper
- If you want to make hand sanding easier, use a sanding sponge. The Medium/coarse sponge corresponds to 80 to 120 grit, Medium/fine to 120 to 180, and Fine to 220 to 320.
- What liquid do you want to use to wipe down your wood? For a lighter colour and faster staining, use methyl hydrate. Otherwise, simply use water.
- Place your order online and choose between in-store pickup and home delivery.
Want to learn more about wood treatment? Check out our blog dedicated to the topic.
Products found in this article.

Gel stripper

Methyl Hydrate

Orbital disc sandpaper
Q&A
Do I really need to sand new wood?
Yes. Always.
Even if your wood is new, it often has mill glaze (a kind of surface “seal” from machining). If you don’t sand, stain or oil will penetrate poorly and the result can be uneven.
What sandpaper grit should I use?
For hardwoods (maple, oak, birch), use the following grits:
80 → to remove old varnish
100 → standard result and a darker colour
120 → colour lighter and a more even
Pour les bois mous, comme le pin, utilise un papier de grain 150.
Keep in mind that:
- the coarser the grit, the darker the colour.
- the finer the grit, the lighter the colour.
Does the sanding tool change anything?
Yes—big time.
Orbital → gentler sanding, use a coarser grit (e.g., 100)
Oscillating → more aggressive sanding, use a finer grit (e.g., 120)
By hand → even more aggressive sanding, use a finer grit (e.g., 150)
Why is my stain blotchy?
Most common causes:
- Glue residue
- Water marks
- Poor sanding
- Surface not cleaned properly
Stain amplifies flaws. If it’s imperfect before, it’ll show even more after. That’s why you need flawless prep.
Do I need to clean after sanding?
Yes. Otherwise sanding dust will block the wood pores.
Use a vacuum and/or a cloth dampened with methyl hydrate or water to remove dust residue.
Does stripper replace sanding?
No.
Stripper removes the old finish, but it doesn’t open the wood. You still need to sand afterward so the new finish penetrates properly.
How can I darken the colour without changing stain?
You can adjust the colour with prep. After sanding, dampen the wood:
Cloth with alcohol → about 25% darker
Cloth with water → up to 50% darker
How long should I wait after dampening the wood?
Alcohol → a few minutes (it evaporates very fast)
Water → at least 30 minutes
The wood must be completely dry before applying stain.
What’s the #1 mistake in wood prep?
The most common mistake is neglecting prep. In practical terms, that means:
- Sanding too fast, unevenly, or without following the wood grain.
- Not cleaning the wood properly before applying stain.
- Not making a sample of your colour before applying it to the whole surface.
A big part of your result depends on your prep—not just the product you use.
Is prep different for an oil than for a stain?
Prep is essentially the same. In both cases, you want:
- A clean surface.
- Even sanding.
- Wood with pores that are properly opened.
The logic behind both prep methods is very similar.


