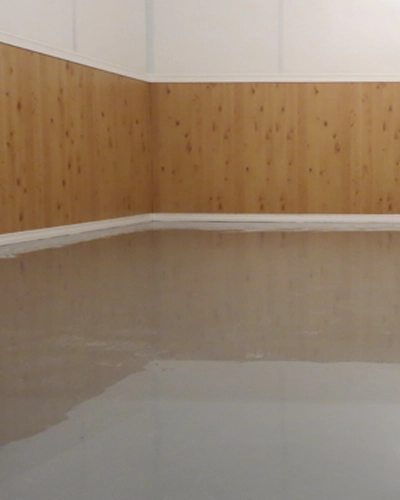
Do you have an old floor you want to transform with something tough, attractive, and durable? Epoxy may be exactly what you are looking for! It is one of the most durable floor-finish options on the market, and it also offers a wide range of options: solid-colour epoxy, vinyl flake broadcast, or even a metallic or marbled effect!
Application is a bit more complex than standard floor paint, but with a little care and the right guidance, anyone can do it! We will show you how.

You dream of an epoxy floor, but your old covering makes you think the project will be complicated? In many cases, the transition is simpler than you might think.
The first step is to remove the existing covering, whether it is ceramic, linoleum, or wood. Then, depending on the condition of the floor, it may be necessary to level it to obtain a stable, even surface. Plywood panels can be used, in particular, to correct differences in level and create a suitable base for the next steps.
Why choose epoxy? Because in addition to offering excellent durability, it can completely transform the look of a room. Modern finish, contemporary effect, wide variety of colours and styles: it is the kind of project that can give a room a whole new personality.
Here are a few tips to maximize your chances and successfully complete your epoxy flooring project.
01
What conditions are required to apply epoxy over your plywood?

1) Your plywood must be completely dry
First of all, make sure the plywood is perfectly dry. This step is far from optional. Moisture trapped in the wood will naturally try to evaporate over time. Once the epoxy is applied, that moisture may push up under the coating, which can lead to adhesion issues, blisters, or even peeling.
Moisture can also interfere with epoxy curing and compromise the quality of the final result. In short, it is better to wait a few extra days than to have to redo the project later.
Once your substrate is completely dry, you must follow one of the golden rules of any epoxy project: surface preparation is never a step you can rush.
2) The plywood must be stable and securely fastened
One of the most common mistakes when installing an epoxy floor over plywood is underestimating how important a solid substrate is. Yet even the best epoxy on the market cannot make up for an unstable or poorly fastened surface.
The reason is simple: once cured, epoxy becomes extremely rigid. Unlike some more flexible coatings, it tolerates very little movement in the substrate it is applied to.
If the plywood panels move slightly or the seams shift, those movements will eventually damage the finish. The epoxy may then split, crack, or delaminate in certain areas.
Before you even think about applying the coating, take the time to verify that the floor is solid. The plywood must be securely fastened, stable, and properly supported. If certain sections seem to move or lack support, it is best to make repairs before you begin.
With epoxy, a solid surface is not a luxury: it is the foundation of a floor that will stay beautiful for years.
3) Your plywood must be smooth and even
Another very important point to keep in mind: 100% solids epoxy is self-levelling. Once applied, it will level itself and settle into every small imperfection in the surface.
That is great news for achieving a very smooth finish… but only if the surface is in good condition. Otherwise, every defect in the substrate will show through: cracks, screw holes, splinters, knots, or seams between plywood panels.
Before application, you therefore need to take the time to fill all of that. A patching epoxy or pore filler is ideal for filling and evening out the surface.
- Mix the patching epoxy until you obtain a uniform texture. The mixing ratio to follow is 2 parts resin to 1 part activator.
- Apply the patching epoxy using a putty knife
- Allow it to cure for 4 to 6 hours.
- Sand with 80-grit sandpaper to level the surface and make it smooth.
Once your plywood is stable and your floor is smooth enough, you will be able to apply 100% solids epoxy over it.
TIP: If you need to purchase new plywood, I recommend choosing premium select or BCFir plywood with one sanded side (or nearly perfect). That way, you will get a smooth surface that is ready to coat right away.
02
Clean your plywood floor before applying epoxy
As with any epoxy project, surface preparation will have a direct impact on the final result. Even a high-end epoxy will not adhere properly to a contaminated surface.
Before application, make sure the floor is perfectly clean and free of grease. Oils, waxes, cleaning products, or certain contaminants can cause adhesion issues and compromise the durability of the coating.
To degrease the surface, you can use a specialized cleaner such as Krud Kutter if thorough rinsing is possible. If you cannot rinse, a citrus solvent applied with a cloth can be a practical option.
If the plywood or floor has already been painted, varnished, or covered with an old coating, sanding is also required. The goal is to remove existing layers and create a sound surface that the epoxy can bond to properly. If you have access to a floor sander, the job will be much faster. Otherwise, many rental centres offer the equipment needed for this type of project.
Once sanding is complete, do not underestimate the importance of dust removal. Even the slightest dust left on the floor can affect the quality of the finish. Vacuum carefully with a shop vac, then do it a second time to ensure the surface is spotless before moving on.
03
Apply a first coat of epoxy to seal the plywood floor

When the surface is clean, dry, thoroughly dust-free, and all joints and imperfections have been patched, it is time to apply a first coat of epoxy.
This coat acts as a primer coat. Its role is to seal the porosity of the plywood and create an even base for subsequent coats. A thin coat of about 8 mils thick is generally applied, which corresponds to coverage of about 250 sq ft per 4.5 L kit (or 400 sq ft per 8.5 L kit).
- Start by mixing the epoxy thoroughly. First mix the resin for 1 min 30 sec to 2 min using a paint mixer attached to an electric drill. Then add the activator to the resin and mix for 2 min at low speed (450 rpm).
- Pour the epoxy directly onto the floor in ribbons. Use a brush to cut in along the edges and corners of the floor.
- For a small area, you can spread the epoxy directly with a roller. If you have a large area, use a squeegee to spread the first coat evenly.
Once application is complete, let it dry until the next day.
It is possible that after this first coat, some wood fibres may raise slightly and make the surface feel a bit rough. If so, a light sanding will smooth the surface before you continue the project.
And of course, sanding also means thorough dust removal. Vacuum once, then a second time to remove the last dust before applying the next coat.
This step helps achieve a much smoother and more professional final finish.
04
Apply the final coat and the different options available to you
At this stage, several possibilities are available to you depending on the style you want to give your floor.
1) Solid colour
The simplest—and generally the most economical—option is a solid, glossy finish. The Passeport Élite range also offers a wide choice of colours, making it possible to create anything from a subtle, contemporary décor to a bolder look.
- Simply apply a second coat the same way as the first. You can apply a thicker coat to ensure the floor is well covered.
- Do you want a perfectly smooth surface? Since plywood is more porous and sometimes more uneven than concrete, we recommend adding an extra finish coat. In total, you will have a three-coat system.
2) Create a metallic effect on your plywood floor
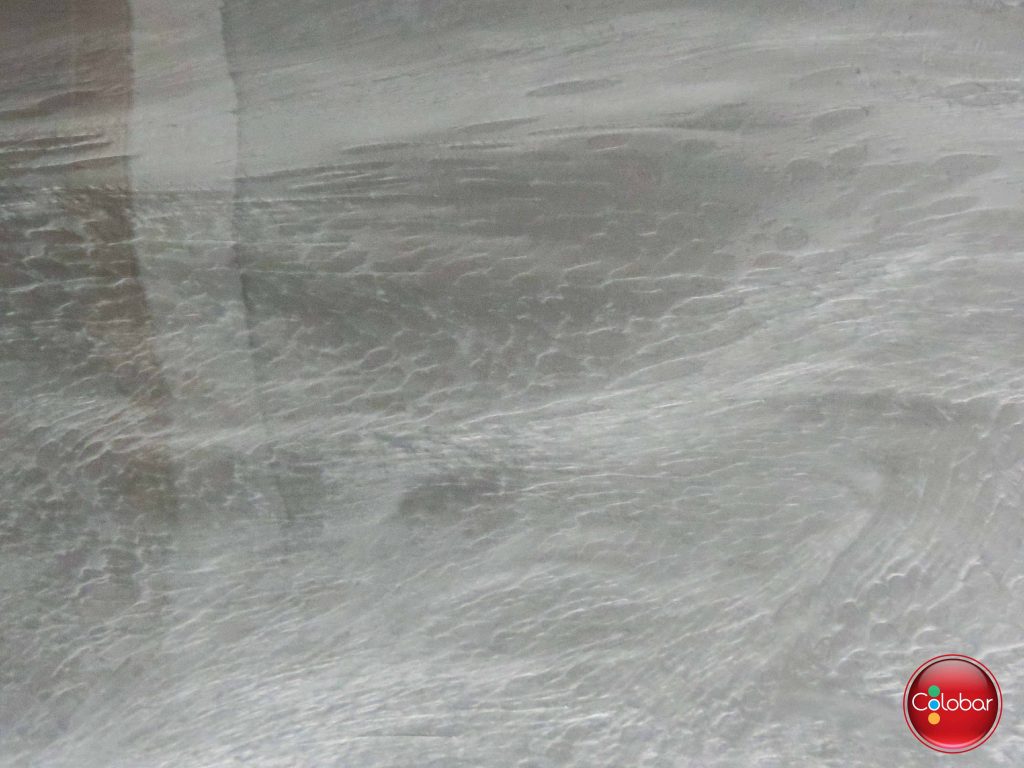
If you are looking for a more breathtaking effect, metallic epoxy is another very interesting option. The application principle remains essentially the same: a base coat (or two in the case of a wood substrate) followed by a thicker finish coat.
The difference is that this last coat is enriched with metallic pigments that create depth, movement, and reflective effects that are impossible to achieve with a solid colour. Also, to achieve a deep effect, you must apply a significantly thicker coat, up to 32 mils.
- If you want an effect with different colours, this is the time to split your kit to make several different mixes. Mix the epoxy resin for 1 min 30 sec with a paint mixer, then add the metallic colourant and mix again until the colour is uniform.
- Once that is done, add the activator, making sure to follow the 2:1 ratio.
- Then pour the epoxy directly onto the floor. Spread it using a squeegee. You can influence the final result based on the movements you make with the squeegee.
- Work one kit at a time until you have covered the entire floor. Use spiked shoes to move around on the epoxy while it is still wet.
- Once finished, let the epoxy cure for a minimum of 24 hours.
The result is often impressive and fits particularly well in contemporary, industrial, or high-end décors. Each floor develops its own character, which makes every project unique.
In short, whether you prefer an elegant solid finish or a spectacular metallic effect, completely transforming the look of a room with epoxy is often more accessible than you might think.
Start your project now!
You will find all the products you need directly on our website.
- Start by measuring your floor dimensions to calculate the quantities you need.
- A solid-colour epoxy covers 250 sq ft / 4.5 L kit
- A metallic-effect epoxy covers 60 sq ft / 4.5 L kit
- Choose between a solid-colour effect and a metallic effect.
- Place your order online and choose between in-store pickup and home delivery.
Would you like to learn more about epoxy? Visit the section of our blog dedicated to this topic.
Products found in this article.

Patching epoxy

100% solids epoxy for floor (4.5L)

100% solids epoxy METALLIC colours
Q&A
Q. Are all types of plywood compatible with an epoxy coating?
Not necessarily. Some lower-quality panels may contain internal voids or have limited stability. For an epoxy floor, it is best to use quality flooring or subfloor plywood that is thick enough and designed to withstand movement and humidity variations.
Q - What should you do if the floor squeaks slightly when you walk on it?
A squeak is often a sign that the structure or panels are moving. Even if the movement seems minimal, it can eventually create cracks in the epoxy. Before applying the coating, it is best to identify the source of the problem and reinforce the structure as needed.
Q - Can heavy furniture or appliances be placed on an epoxy floor?
Yes, but you need to respect the system’s full curing time. An epoxy coating may appear dry after a few days while still continuing to build toughness for several more days. Moving heavy objects back too soon can leave marks or damage the finish.
Q - What happens if small bubbles appear during application?
Bubbles can come from several sources: air trapped in the wood, improper temperature, or mixing the product too vigorously. In most cases, they can be corrected during application, but they are often a symptom of a substrate that is too porous or incomplete preparation.
Q - Does an epoxy floor become slippery?
It depends on the type of finish chosen. A very glossy finish may feel more slippery, especially when wet. Fortunately, there are anti-slip additives that can be incorporated into the system without necessarily affecting the appearance of the floor.
Q - How do you repair scratches several years after installation?
To make a repair or correct the finish, clean the floor with a degreasing cleaner. Then sand the surface to create a profile using 60- or 80-grit sandpaper. Finally, apply a clear coat of epoxy over it to refresh the finish.
You can also use an epoxy topcoat.


