
Chinking is an essential step in maintaining a log home. In addition to preventing water and air infiltration, it protects logs from moisture, improves the home’s energy efficiency, and helps preserve the structural stability over the years.
We’ll teach you why chinking is so important, what tools to use, and how to apply chinking step-by-step for effective and long-lasting insulation.
Here is the method we recommend for durably chinking a log home. The steps presented are based on the application method of Sansin’s Timber-Tec chinking and the specific characteristics of this product.
01
Properly prepare joints before applying sealant
Before applying chinking, the joints between the logs must be clean. This is where dirt, dust, and contaminants tend to accumulate, which can impair sealant adhesion.
To clean them, use a mixture of water and ammonia or water and alcohol to remove grease, resin residues, and other contaminants.
Also take the opportunity to inspect the joints. If you notice splinters, frayed or crumbling wood, remove them with a spatula or scraper. This will provide a healthier and more uniform surface, which will promote better adhesion and increase the durability of the chinking.
Take the time to complete this step properly: good preparation will ensure your sealants last longer.
02
Install backer rods (or log tubes) inside the joints
Insulating strip, also known as backer rod, is a compressible foam installed at the base of joints before applying chinking. It is available in several shapes (round, triangular, rectangular, or “P-shaped”) to accommodate various joint widths.
Its role is much more important than simply filling a space. It improves insulation, reduces the amount of chinking needed, and, most importantly, allows the sealant to better resist the natural movements of the wood.
When should a backer rod be installed?
Mainly in two situations:
- During the first chinking of a new log home. The logs will contract and expand during the first few years. By limiting the thickness of chinking inside the joint, the backer rod reduces the stress on the sealant and decreases the risk of cracking.
- When joints are particularly wide. Even on an older home, if the space between the logs is significant, the backer rod helps limit chinking movement while reducing the amount of product needed.
Conversely, if the joints are narrow and the logs are stable, you are not obliged to install backer rods (or log tubes).
Installation tip
First, apply a thin bead of chinking to the bottom of the joint using a gun. Then use this bead as an adhesive to hold the backer rod in place. This will make installation easier and ensure the rod remains well-positioned during chinking application.


IMPORTANT: Chinking begins to harden after 20 minutes. Once hardened, you will not be able to use it to secure your backer rods. It is therefore important to work on one joint at a time, to ensure you have time to apply the tubes before the sealant dries.
03
Apply Sansin chinking step-by-step
You need a chinking gun to apply Sansin chinking. There are several categories and qualities of guns, but we’ll tell you more about that later in the article.
- Use the gun to apply the chinking into the joint groove. Always apply along the length. Be careful not to apply too much, because if the sealant is too thick or overflows, it increases the risk of cracking. The perfect thickness for your joint is 1/8 to 1/4 inch.
Smooth the chinking with a putty knife
- As soon as you have finished applying your sealant, smooth it with a small putty knife. To work more easily, choose a knife that is approximately the width of your joints. If necessary, you can even create your own tools!
- The goal is to smooth the chinking so that your joint has a uniform appearance.

TIP: Do you want to achieve a perfectly smooth joint without too much hassle? Equip yourself with a spray bottle filled with 99% pure alcohol, such as methyl hydrate. Alcohol softens the sealant, like a solvent would. This allows you to smooth it more easily and achieve a better result. Be careful not to use 70% or 50% alcohol. These alcohols will only make the chinking harden faster, as they generate moisture. Moisture accelerates the hardening of Timber Tec chinking. It is therefore very important never to use water to apply Timber Tec.
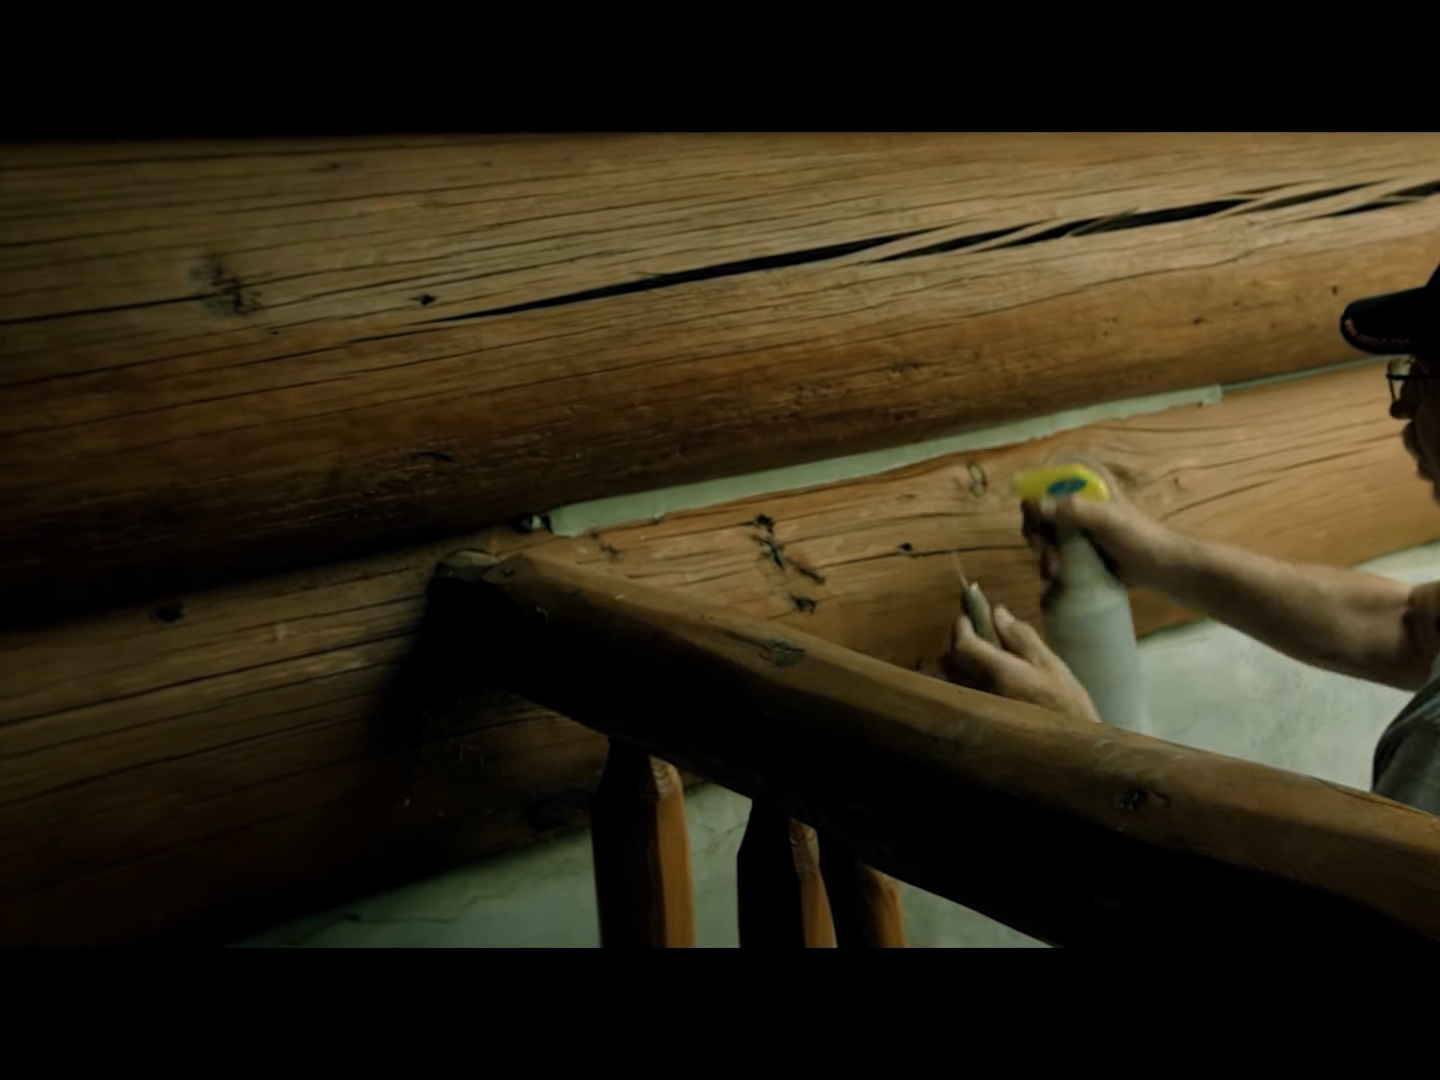
Keep in mind;
- Timber Tec chinking begins to harden after 20 minutes. If you want to make your task easier, work on one joint at a time.
- Apply the chinking into the joint with the gun and smooth as you go.
- If you work in a team of two, it can make the task easier. One person applies with the gun and the other smooths with the putty knife.
Continue in this manner until all the joints of your log home are chinked.
Some tips for keeping your logs clean
To avoid staining your home’s logs with sealant, you can protect them with a plastic sheet.
Want to save time installing the sheet? You can also clean as you go using a cloth soaked in methyl hydrate. Wipe immediately, as the sealant will be much harder to remove once dry.
Something that works in your favor: Timber-Tec is a 100% solid chinking, so it does not run and stains surrounding surfaces less.
04
Under what conditions should Timber Tec chinking be applied?
A big advantage of Timber Tec is that it is not a water-based chinking. You can therefore apply it at low temperatures (down to -1 degree) without fear of it freezing. Rain will not dilute Timber Tec for the same reason. Be careful, however: very humid weather can accelerate the hardening of the sealant.
Furthermore, Timber Tec is not particularly sensitive to heat or sunlight. This allows you to apply it across a wide range of temperatures.
Still keep in mind that temperature can influence the drying time of the sealant.
| Conditions | Approximate drying time |
|---|---|
| Cold weather (temperatures below 10°C) |
Up to 14 days |
| Normal conditions (21 °C and 40% humidity) |
Approximately 3 days |
| Hot weather (high temperatures 25°C and +) |
Approximately 1 day |
TIP: temperature can also affect your chinking tubes. If it’s very cold, keep the tubes (sausages) indoors to prevent them from hardening. In very hot weather, keep them cool.
05
Different chinking gun options
We present the three main types of guns for chinking your log home or cabin.
A) Cordless electric gun.
This is the most expensive gun. Let’s be clear; if you don’t have a large house or don’t regularly do chinking projects, this might not be the best for you.
However, if you want the greatest possible comfort during application or if you frequently apply chinking, it’s an investment that will certainly pay for itself.
You don’t need to press continuously as with a manual gun. It’s less tiring, but most importantly, it ensures your joint will always be the same thickness. You therefore work much faster and reduce the risk of overflowing the joint.
Since the joint thickness is always the same, you therefore need to smooth less with the spatula – and that saves you a lot of time!
It is therefore the best gun for working as quickly as possible – while achieving an impeccable result.
B) Deluxe chinking gun

Price: $224.99 + taxes
- Teflon piston ideal for applying chinking in tubes (or sausages)
- 2-inch diameter metal barrel
- Shock and dent resistant
- Allows 120 PSI pressure
- 375 lbs thrust
- Durable and non-slip handle
Estimated delivery: 5–7 business days
In-store pickup available
This gun is reinforced with a piston that allows for more uniform pressure and saves you a lot of effort. It is also more shock-resistant and more compact.
This is a good mid-range option: it’s not the cheapest gun, but it remains quite affordable. If you need to chink your log home or cabin and want to make the task easier, the Deluxe manual gun is exactly the tool you need.
05
Why it's important to chink your log home
Quality chinking not only improves the appearance of the home. It contributes directly to its durability, energy efficiency, and the comfort of its occupants.
-
Reduce heat loss
The joints between logs are the main points where air can infiltrate. By chinking them correctly, you limit heat loss and improve the home’s energy efficiency.
This contributes to greater comfort indoors and, often, a lower heating bill, especially in the Quebec climate.
-
Improve structural stability
Wood is a living material. It contracts and expands with the seasons, especially during the first few years after construction.
A flexible and well-applied chinking accommodates these movements while keeping the joints well sealed. It thus helps to limit movement between logs and to preserve the structural stability over time.

-
Protect logs from moisture
Joints are particularly exposed to water infiltration. If moisture accumulates there, it can promote the growth of fungi, mold, and accelerate wood degradation.
Good chinking acts as a barrier against water. Combined with an appropriate exterior finish, it helps extend the lifespan of the logs.
-
Preserve the home’s appearance
In addition to protecting the structure, well-maintained chinking gives the home a clean and uniform finish. The joints remain regular, there is no water infiltration that can damage the logs, and the home retains its neat appearance longer.

Start your project now!
You will find all the products you need directly on our website.
- Start by measuring the dimensions of your joints to calculate the quantities of Timber-Tec you need.
- Keep in mind that the depth of the joints will also influence the quantity you will need.
- Choose the sealant color that best matches the logs of your log home.
- Place your order online and choose between in-store pickup and home delivery.
Want more tips and advice for protecting and maintaining your log home? Consult our page dedicated to log homes!
Products found in this article.

Sansin Chinking Timber-Tec for Log Homes

Deluxe chinking gun

Economical chinking gun
FAQ
Q. How do I know if my chinking needs to be repaired or completely replaced?
Small superficial cracks do not always mean that everything needs to be redone. However, if the chinking is peeling from the logs, cracked, or allowing water or air to pass through, you will probably need to remove it completely. A good inspection of the joints often makes it possible to target only the sections to be redone.
Q. Can I apply new chinking directly over old chinking?
It depends on its condition. If the old chinking still adheres well, is flexible and in good condition, some products allow for localized repair. However, if the sealant is cracked, crumbly, or detached, it is best to remove it before applying new sealant to ensure good adhesion.
Also ensure the compatibility of the two products.
Q. What happens if the logs continue to move after chinking?
This is completely normal: a log home continues to work with the seasons. Quality chinking is designed to remain flexible and accommodate these movements. However, if the movements become abnormal or very significant, it may be necessary to check the structure or make certain adjustments before redoing the joints.
Q. How often should log home chinking be inspected?
Even if quality chinking can last many years, it is recommended to inspect the joints at least once a year, ideally in the spring. This way, you can quickly detect a crack, detachment, or infiltration before the problem worsens.
Q. What is the error that most reduces the lifespan of chinking?
The most common error is neglecting the exterior maintenance of the home. Even excellent chinking cannot protect logs constantly exposed to moisture or an ineffective protective finish. Chinking and exterior finish work together: maintaining one without the other reduces the overall durability.


