

Delivery: Ready to ship anywhere in Canada
“Super beautiful finish, better than I expected. Fast delivery 3 days wow.”
Do you want a wood table covered with epoxy? In this video, Chantal Boily and the Colobar team will teach you how to apply wood table epoxy in 9 easy steps, from preparation to finishing!
01
Mixing the wood epoxy

- Add part A to part B at a 1:1 ratio and mix for 5 minutes. Make sure you have thoroughly mixed both components throughout the mixture, otherwise the epoxy will not cure.
- Scrape the edges of the container with a plastic spatula or a wooden stick to ensure that both parts are completely mixed together.
TIP: Use a plastic or wooden container and tools for mixing. Metals can react upon contact with epoxy.
02
Pouring the epoxy onto your wood table
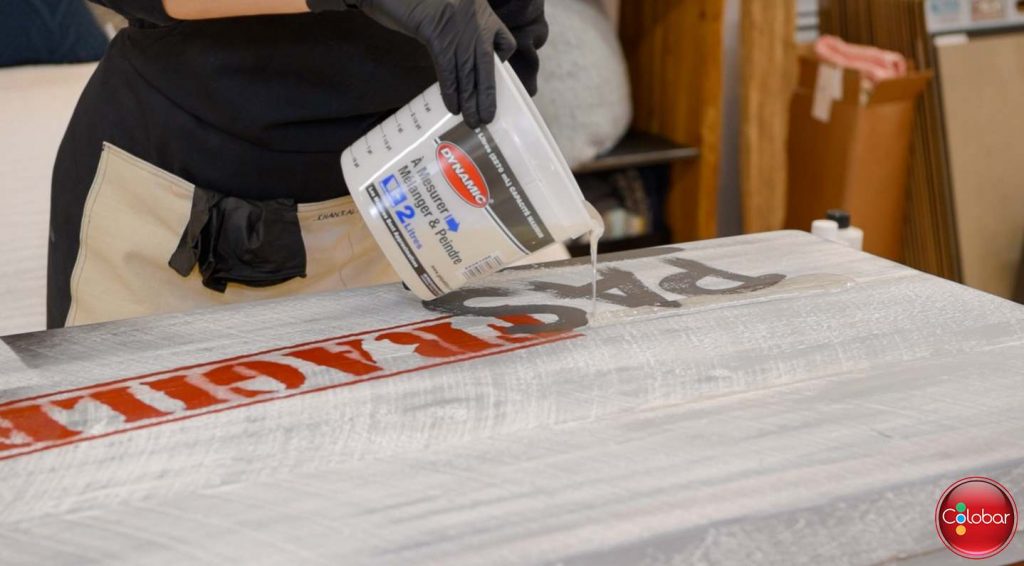
- As soon as mixing is complete, pour the epoxy directly onto the table or surface to be covered. It is best to avoid leaving the product in the container, as it will gradually begin to harden.
Why? As soon as components A and B are mixed, a chemical reaction occurs. This reaction generates heat, which allows the epoxy to harden and reach its final strength.
The problem is that this heat accumulates much more quickly when the epoxy remains concentrated in a container. If you wait too long before applying it, the product can start to harden, or even become unusable, before it is even poured onto the surface.
By quickly pouring the epoxy onto the table, the product spreads out and the heat dissipates more easily. The curing reaction is then slowed down, which gives you more time to work and spread the epoxy evenly.
- Pour the product directly onto the surface, forming epoxy beads lengthwise and widthwise across the table.
You can then spread it evenly over the entire surface.
03
Spreading the epoxy on the table with a spatula
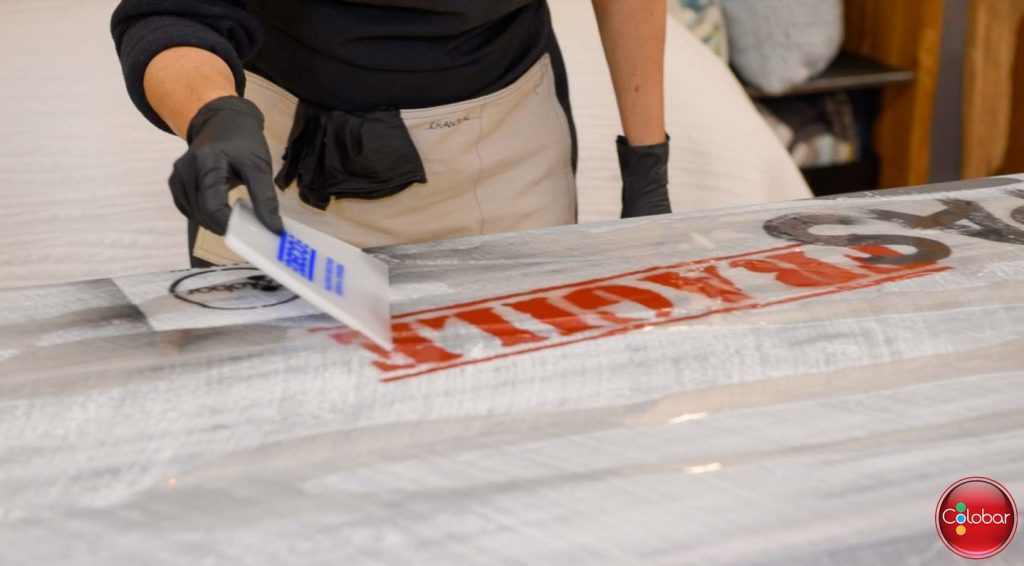
- Once the epoxy is poured, spread it evenly over the entire surface using a plastic trowel.
Epoxy is self-leveling, but that doesn’t mean it will spread perfectly on its own. You need to help it move to cover the entire surface uniformly.
- Do you want better control over the thickness of your epoxy? Use a notched epoxy spreader instead. Its teeth allow the product to be distributed more evenly over the entire surface.
- Don’t be afraid to bring the epoxy right to the edge of the table. Just make sure you have adequately protected the surface underneath, as the excess will naturally flow over the sides.
- Once the epoxy has sufficiently hardened, you can remove the drips that have formed under the edges.
04
Covering the sides of the wood table
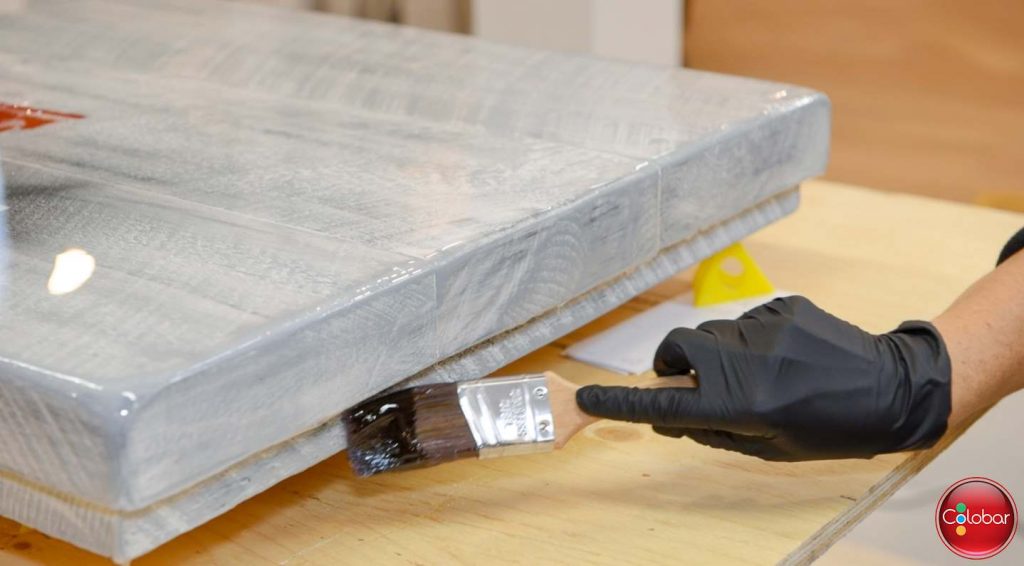
- Use a brush to wipe away any epoxy drips that form on the edges of your table. We recommend using an economical brush as you will have to discard it afterwards.
05
Heating the epoxy resin with an embossing heat gun to remove air bubbles

It is quite normal for some air bubbles to appear on the surface after pouring the epoxy. However, you must act quickly to eliminate them within 20 minutes of application. At this point, the epoxy is still liquid and flexible enough for bubbles to escape easily.
- Preferably use an embossing heat gun to remove bubbles. You could also use a torch or a heat gun, but an embossing heat gun is generally easier to control and allows for precise work.
- Simply bring the embossing heat gun close to the areas where you see bubbles, without directly touching the epoxy. The radiant heat will warm the product and make it more liquid. The bubbles can then rise and escape from the surface.
- Be careful not to stay in the same spot for too long. The goal is to heat the epoxy enough to make the bubbles disappear, without overheating the product.
To learn more about the different tools and techniques used to de-bubble epoxy, consult our article on epoxy de-bubbling tools.
06
After 20 min, scrape off drips on the table edges
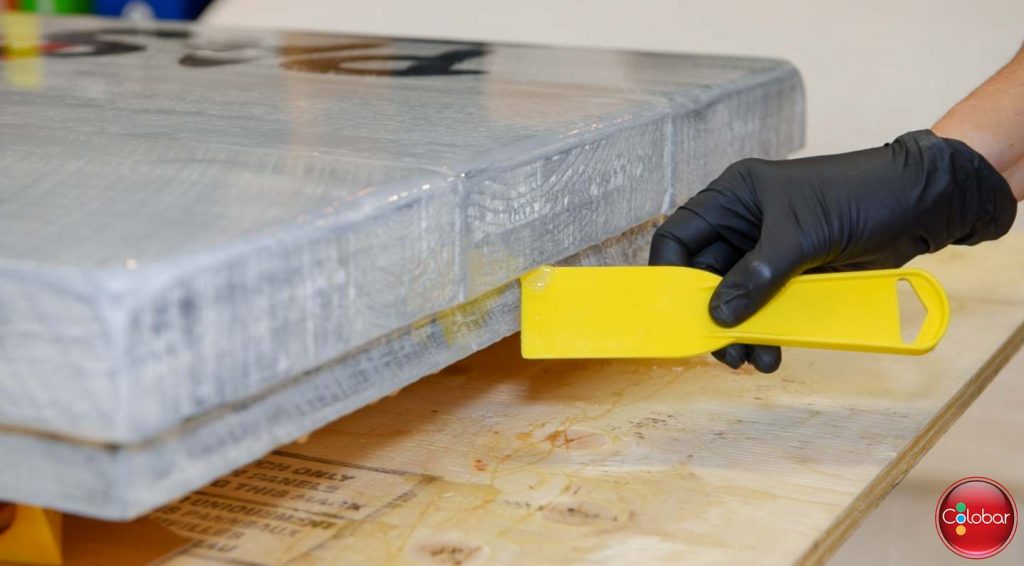
- Once you have finished de-bubbling, let the epoxy cure for 20 min.
- Then, wipe the edges of the table using a spatula. This will remove most of the epoxy drips on the edges of your wood table.
- Allow to dry for 24 hours before proceeding to the next step.
07
Once the epoxy is dry, remove drips with an X-Acto knife
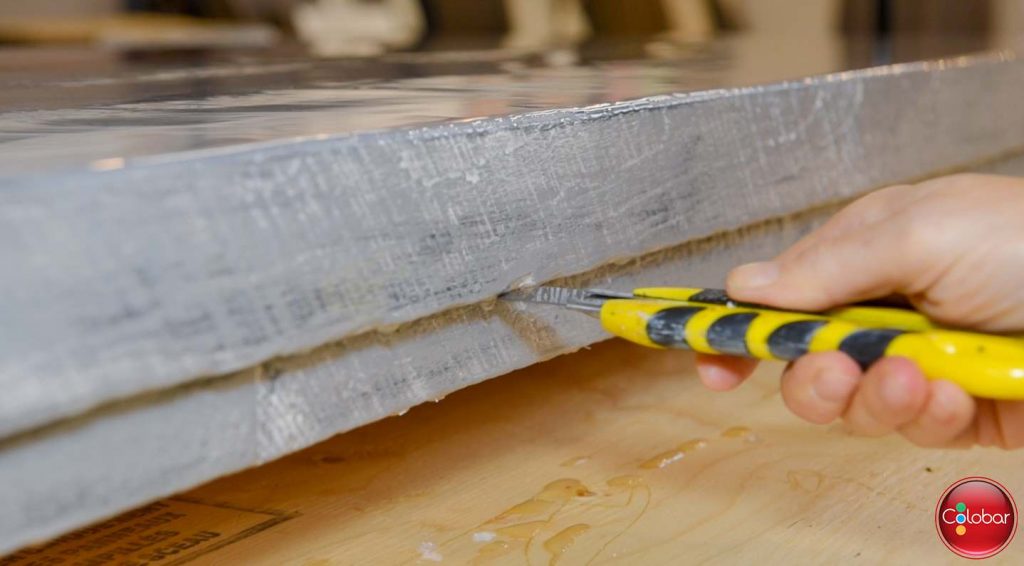
- When the epoxy has completely cured, scrape off the droplets caused by the epoxy drips. The best tool for this is a utility knife (X-Acto).
TIP: Make sure the knife blade is new to avoid accidents. If necessary, change the blade several times during the project.
08
Sand imperfections in the epoxy on your wood table
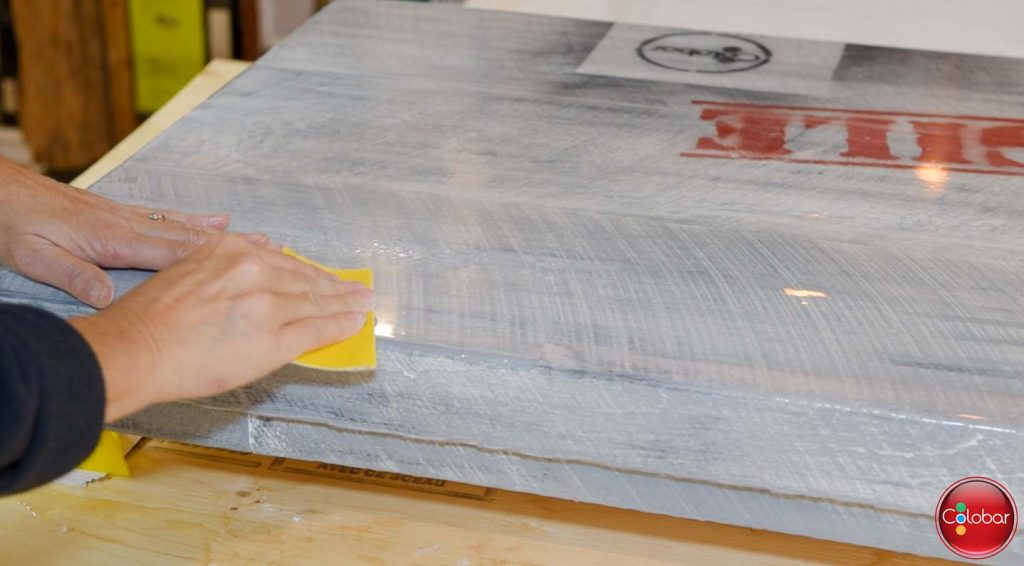
- After about 24 hours, sand the surface to achieve as smooth a result as possible. Take 220-grit sandpaper and sand areas where you notice an uneven or rough appearance.
Once sanding is complete, vacuum to remove sanding residue.
09
Apply a thicker 2nd coat of epoxy
- Apply a new coat of epoxy following steps 1 to 7. The second coat should be thicker to ensure maximum resistance. The thickness of the 2nd coat will also give your wood table a ‘glass-like’ effect.
- Once the final coat is applied, let the epoxy cure completely (between 24 and 48 hours) before using the table.
IMPORTANT: Do not sand after applying the 2nd coat. Otherwise, the finish of your epoxy will appear scratched.
Start your project now!
You will find all the products you need directly on our website.
- Start by measuring the dimensions of your table to calculate the quantities you need.
- The Nu-Lustre 57 covers 10 sq ft per liter and 40 sq ft per gallon.
- Place your order online and choose between in-store pickup and home delivery.
Do you want more ideas for finishing a wood table or piece of furniture? Consult the section of our blog dedicated to this topic!
Products found in this article.

Circa Nu-lustre 57 UV resistant wood epoxy

Graduated Container (2.4L)

Notched epoxy spreader
Q&A
Q. Why do bubbles continue to appear several minutes after de-bubbling the epoxy?
If new bubbles rise after your first pass, they may come from the wood itself. Porous surfaces contain air that can gradually escape as the epoxy cures. A thin sealing coat before the final application helps to limit this phenomenon.
Q. Can an epoxy table be made in an unheated garage?
It is possible, but ambient conditions have a significant influence on the curing time of epoxy. Too low a temperature can considerably slow down hardening and alter how the product levels. For a predictable result, it is best to work in temperatures between 20 and 25 °C and with humidity below 50%.
Q. What should I do if dust falls into the epoxy while it is curing?
Do not attempt to remove dust with your finger or a tool while the epoxy is still liquid. You risk leaving a mark much more visible than the dust itself. The most important thing is to protect the table during curing by limiting movement around the surface and covering it without the protection touching the epoxy.
Q. Why did my epoxy not spread evenly on the table?
A surface that is not perfectly level can lead to epoxy accumulation on one side and a thinner coat on the other. Before pouring the product, make sure your table is level in all directions. Since epoxy is self-leveling, it will follow the slope of the surface rather than correcting poor leveling.
Q. Can a new coat of epoxy be added if the first one is not thick enough?
Yes, but the manufacturer’s recommended waiting time between coats must be observed. A new coat can be applied when the first one is sufficiently cured to be covered, but not necessarily completely cured. The waiting time can vary from product to product. In the case of Nu-Lustre, it is 24 hours between coats.
Q. Why did my epoxy become cloudy or lose its transparency?
Several factors can affect the clarity of a resin: an incorrect proportion between the two components, inadequate mixing, temperature or humidity outside the recommended conditions, or the use of a product not suitable for the project. Before mixing, always check the ratio and application conditions specific to your epoxy.


