
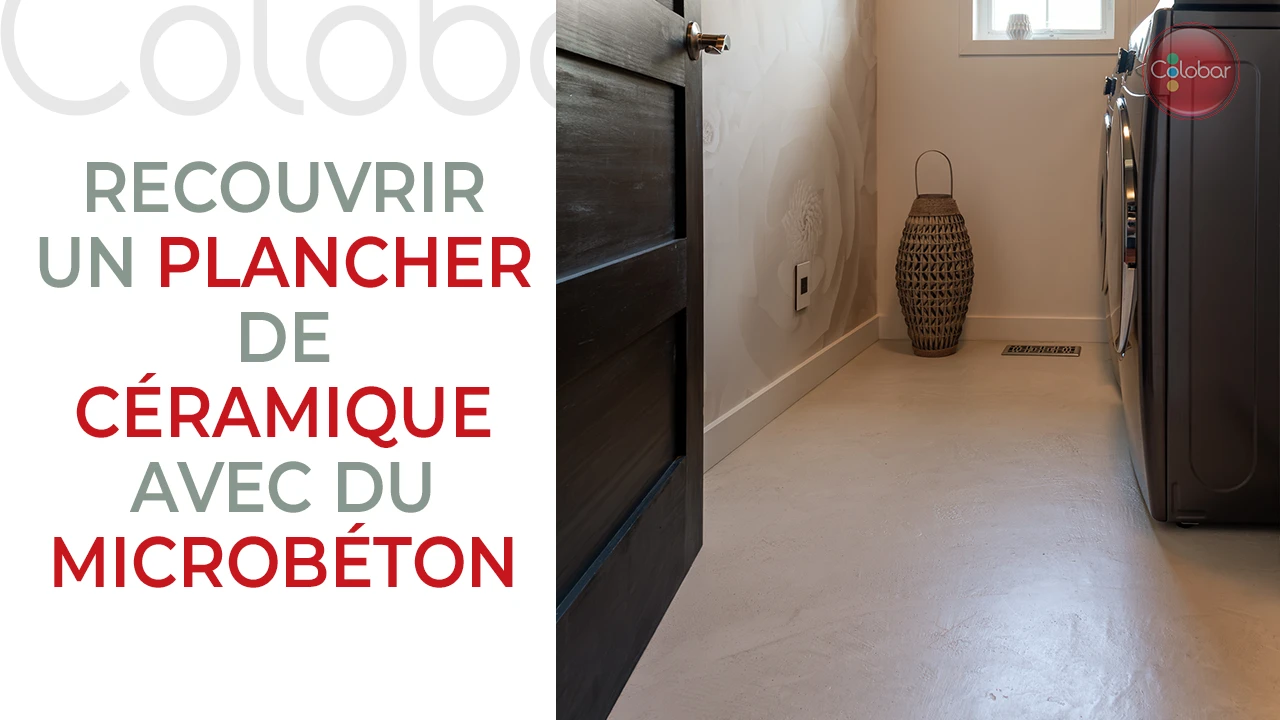
Replacing an old ceramic floor can quickly become an intimidating project. Between demolition, dust, debris, and labor costs, many abandon the idea before even starting. However, there is a much simpler way to resurface an aging ceramic floor without tearing everything out.
If you wish to modernize your floor without undertaking major work, Finitec’s MicroConcrete can be applied directly over existing ceramic tiles to create a genuine concrete effect. This provides a contemporary, uniform, and durable look, without demolition.
We will show you how to cover a ceramic floor with a concrete effect, step by step, to give your surface a new life without demolishing everything.
01
Preparing the Floor Before Applying the Concrete Effect
Preparation is an essential step for MicroConcrete to adhere correctly to your old floor. Even the best product will not yield good results if the surface is poorly prepared.
For this type of project, preparation involves three main steps: thoroughly cleaning the ceramic tiles, sealing the grout lines, and then filling them with a first coat of MicroConcrete.
No Need to Remove Ceramic Tiles
This is precisely one of the major advantages of covering ceramic tiles with a concrete coating rather than replacing the entire floor. You avoid demolition, dust, debris, and all the heavy work that typically comes with ceramic replacement. This makes MicroConcrete an excellent solution for transforming an old ceramic floor without undertaking major work.
However, as ceramic is a very smooth surface, it is important to take the time to prepare it properly. Thorough preparation ensures that the concrete effect coating adheres well and significantly reduces the risk of cracks or wear over time.
02
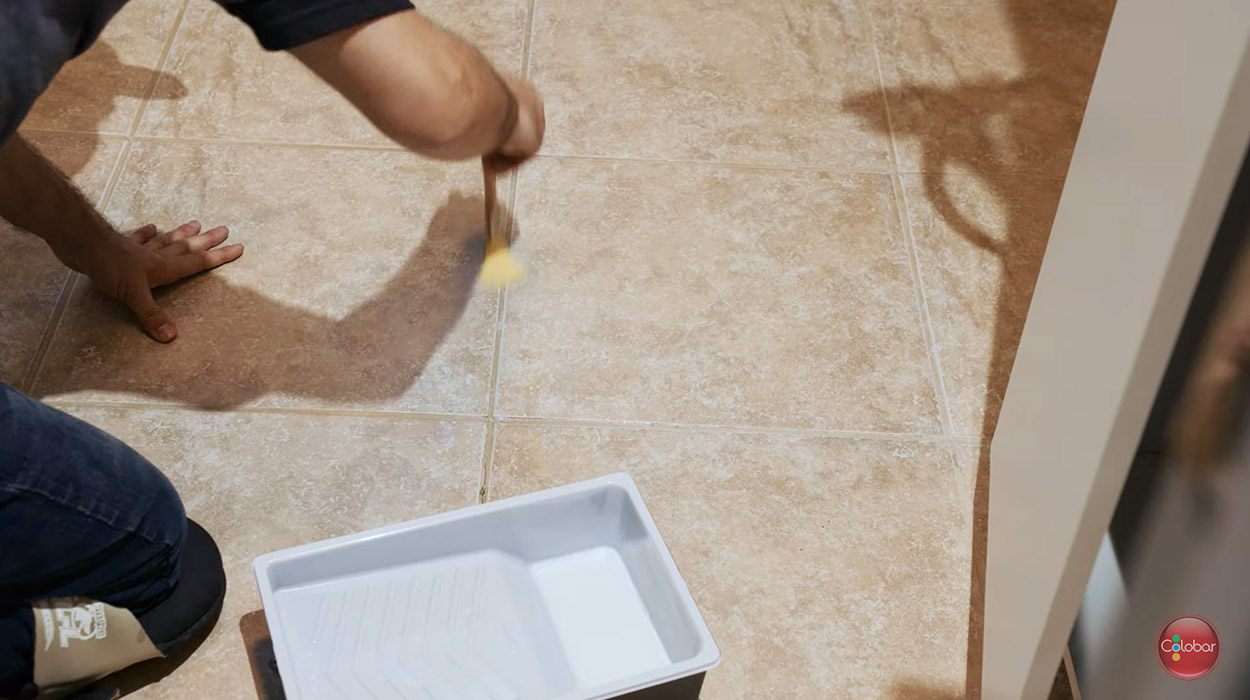
Clean and Dust the Ceramic Tiles
Cleaning removes all contaminants that could hinder MicroConcrete adhesion. On an old ceramic floor, this is particularly important: over time, grout lines often accumulate grease, dust, and cleaning product residues.
- Start by vacuuming thoroughly—ideally twice rather than once. Take the time to go over the grout lines with a narrow attachment, as this is often where dirt accumulates the most.

- Next, pour a small amount of Finitec Surface Preparation directly onto the ceramic tiles. Spread the product over a section of approximately 50 sq ft using a varnish applicator or a microfiber mop to ensure full coverage, including the grout lines.

- Allow the product to act for approximately 5 minutes to dissolve contaminants embedded in the ceramic and grout lines.
- Once the time has elapsed, remove the excess with a clean, lint-free damp cloth or a microfiber mop.

-
Repeat these steps until the entire floor is completely clean.
NOTE: If certain stains or greasy areas resist the first cleaning, simply apply a second coat of Surface Preparation. It is better to re-treat a section now than to compromise the adhesion of the entire concrete effect coating for a few overlooked spots.
Once cleaning is complete, allow the floor to dry completely before starting the next step.
03
Sealing the Ceramic Grout Lines
Once cleaning is complete, it is now necessary to prepare the ceramic grout lines. This step is often underestimated, but it plays an important role in the durability of the project.
Grout cement is a very porous material. If it is not sealed before MicroConcrete application, it can allow moisture or certain emulsions to rise, which may affect the final result.
Over time, this can cause problems such as cracks, crumbling, or visible marks directly at the ceramic grout lines.
Sealing Ceramic Grout Lines
To avoid this problem, apply a thin coat of MicroConcrete Protective Sealer—or a sealer designed for ceramic grout lines—directly into the grout lines.
- Use a foam brush or a small polyester brush to ensure the product penetrates well without excessively overflowing onto the ceramic tiles.
- The goal here is not to create a thick surface layer, but rather to stabilize and waterproof the grout lines before covering the ceramic with concrete.
- Then, allow to dry for approximately 3 to 4 hours, or follow the drying time recommended by the sealer manufacturer.
04
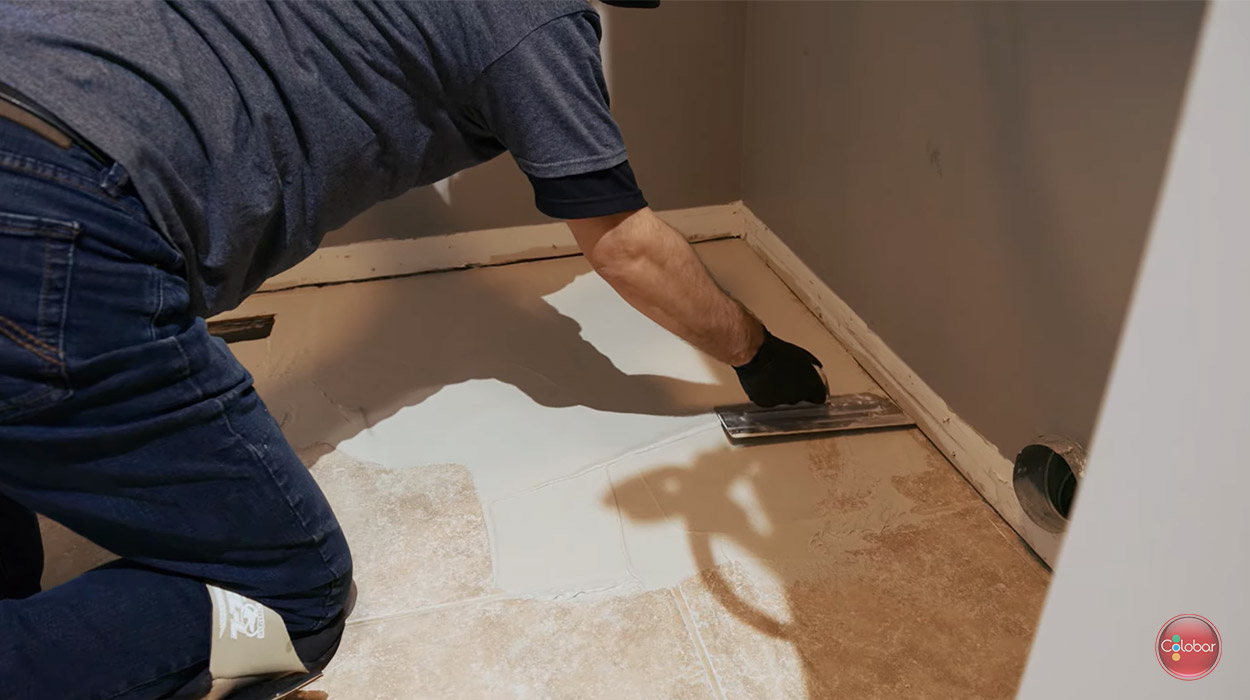
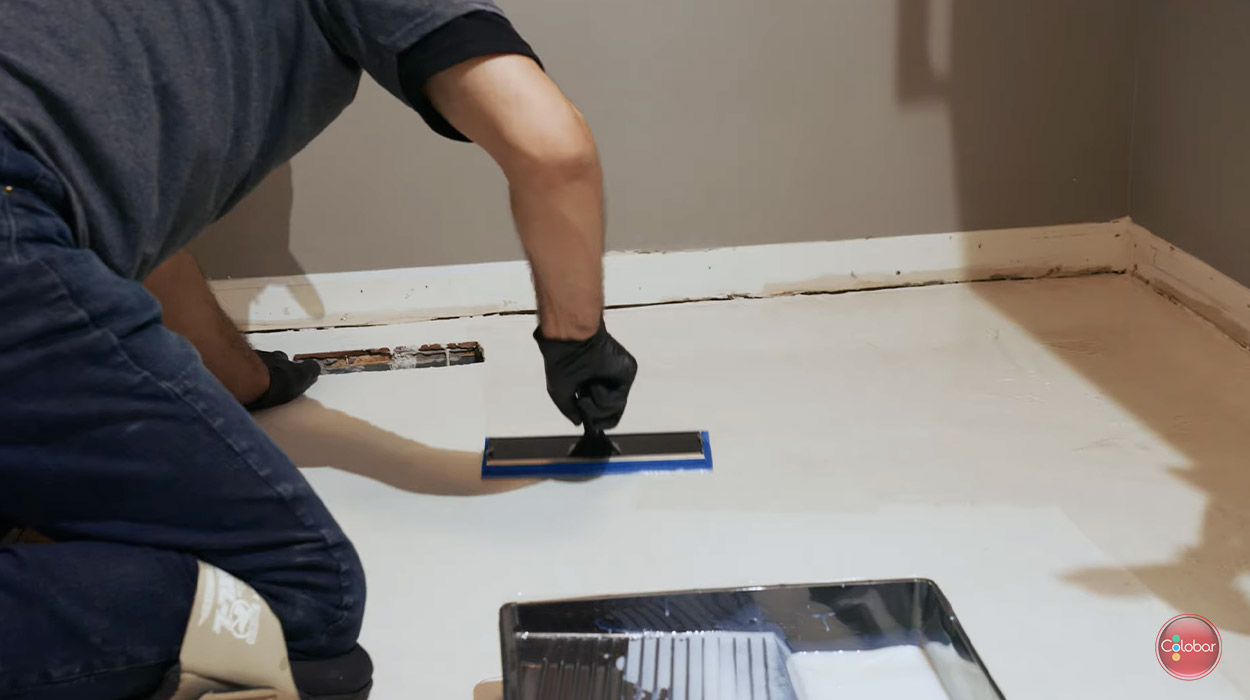
Filling the Grout Lines

- Continue in this manner until all grout lines on the floor are filled and leveled.
- Then, allow the MicroConcrete to dry for approximately 3 to 4 hours, or until the surface is hard enough to be worked.
- Once dry, remove small imperfections by lightly scraping the surface with a trowel or by light sanding with 80-grit sandpaper. The goal here is not to remove the product, but simply to even out the floor.
- When sanding is complete, vacuum thoroughly to remove all dust before applying the next coat.
IMPORTANT: When removing sanding dust, do not use a damp cloth or water on the grout lines that have just been filled with MicroConcrete. Even if the product appears dry on the surface, it continues to cure internally for several hours. Moisture could therefore soften or dilute the coating, which risks compromising the solidity of the final result.
05
Covering the Ceramic with Concrete Effect
Once the grout lines are leveled and thoroughly dry, you can now proceed to the most exciting step: applying MicroConcrete over the entire surface.
To achieve a beautiful, uniform concrete effect on your ceramic tiles, you will need to apply two coats of MicroConcrete, respecting the drying time between each. Then, you will protect the finish with a sealer suitable for floors.
Applying MicroConcrete
Prepare the Mixture
MicroConcrete is obtained by mixing the cementitious powder with water until a smooth, easy-to-work texture is achieved.
The recommended ratio is 5:1, meaning 3.5 kg of MicroConcrete powder for 700 ml of water.
- First, pour the powder into a clean and sufficiently large bucket or plastic container.
- Then, add the recommended amount of water.
- Mix everything with a mixing attachment fixed to an electric drill.
- Continue until a homogeneous, creamy, and lump-free texture is obtained. The consistency should be flexible enough to spread easily, without being too liquid.
IMPORTANT: Be sure to respect the indicated mixing ratio. Otherwise, the concrete floor could crack prematurely over time.
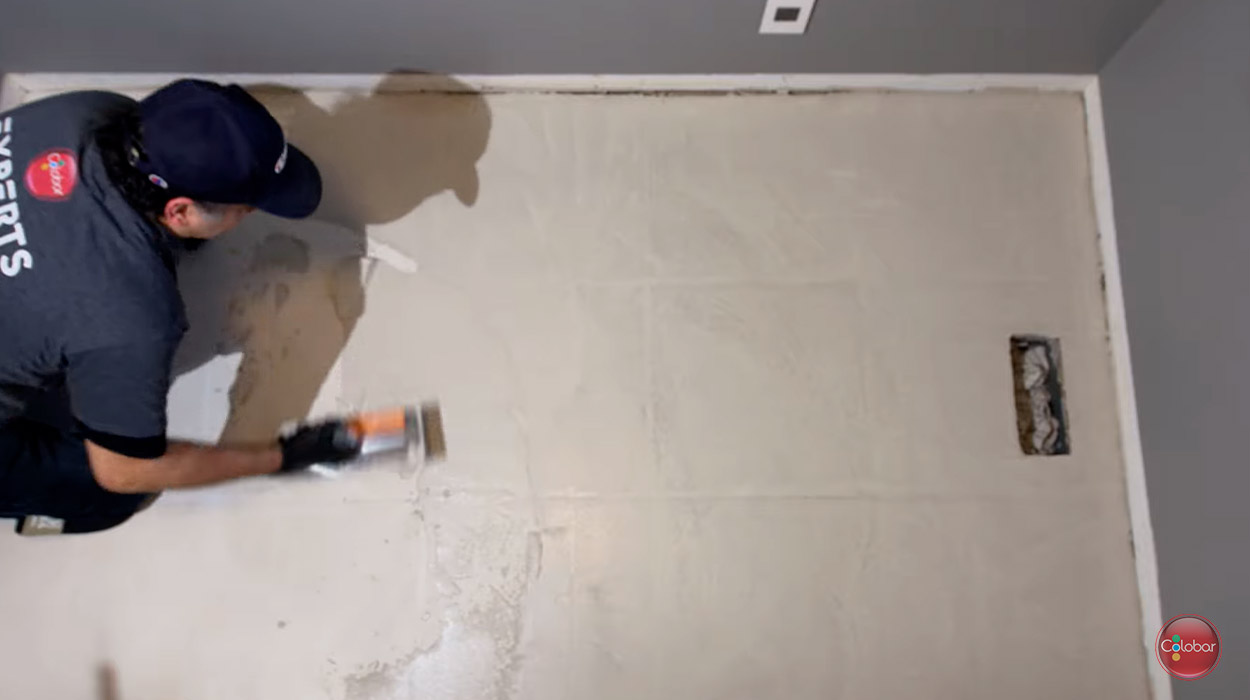
Apply the 1st Coat
The first coat of MicroConcrete will create a uniform surface and gradually give the appearance of a real concrete effect floor.
For easier work, it is ideal to use two types of trowels:
- a standard trowel for applying and spreading the product;
- a finishing trowel with a wider blade to smooth the surface and refine the final effect.

“Level Perfectly”
Mackenzie, client confirmé
- Always start in the corner furthest from the room’s exit. This way, you can progress without having to walk on the fresh coating.
- Then, place a small amount of MicroConcrete directly on the floor and spread it with the standard trowel.
- To achieve a more natural look, work with half-moon or slightly circular movements rather than perfectly straight lines. This helps create the characteristic movement and nuances of a decorative concrete finish.
- Try to maintain a thickness of approximately 2 mm when applying MicroConcrete. There is no need to apply too much: an overly thick coat will be more difficult to work with and to even out.
- Then, allow the product to begin setting for approximately 15 to 30 minutes. The exact time may vary depending on the room’s temperature and humidity.
- When the MicroConcrete begins to firm up slightly, use the finishing trowel to smooth the surface and create the desired concrete effect. It is at this stage that you can further work on the movements, nuances, and character of the finish.
- Then, continue section by section until the entire floor is covered.
- After approximately 3 to 4 hours of drying, check the surface and remove small irregularities by lightly scraping with a trowel.
- If some roughness remains, perform light sanding with 80-grit sandpaper to even out the finish.
- When sanding is complete, remove all dust with a vacuum cleaner or a dry cloth. Avoid wetting the surface at this stage to avoid compromising the adhesion of the next MicroConcrete coat.
Note: It is possible that grout lines may still be visible after the 1st coat. In this case, apply a 2nd coat, and they will disappear!
Apply the 2nd Coat of MicroConcrete
After thoroughly dusting the floor and allowing the first coat to dry for approximately 3 to 4 hours, you can proceed to the second coat.
- Apply the product in the same way as before: apply the MicroConcrete with the standard trowel, then spread it with arc or circular movements to maintain the natural concrete appearance.
- When the coating begins to set slightly—generally after 15 to 30 minutes—use the finishing trowel to smooth the surface and adjust the visual effect according to your desired style.
- Once the entire surface is covered, allow to dry for approximately 3 to 4 hours.
For a Softer Finish
Do you want a smoother, softer finish?
- Perform light sanding with 120-grit sandpaper after drying.
- Carefully remove all dry dust with a vacuum cleaner or a clean, dry cloth. Again, avoid using water at this stage.
Before applying the protective sealer, allow the floor to dry for at least 12 hours.
Note: Are the grout lines still visible? Apply a 3rd coat to make them disappear completely.
06
Protecting the Concrete Effect with a Finish
The sealer is what will protect your new concrete effect floor daily. Without it, MicroConcrete would remain vulnerable to liquids, stains, and normal wear.
It is therefore an essential step to make the surface washable, more resistant, and suitable for residential use.
Before applying the sealer, ensure that the last coat of MicroConcrete has dried for at least 12 hours.
MicroConcrete Protective Sealer is available in two different finishes:
- Wet Look: a slight sheen reminiscent of a satin finish.
- Matte Look: a more natural finish, with little to no reflection.
For a floor, we recommend the wet look sealer. Why? Because the wet look sealer is more resistant to liquids, and this is a factor to consider for horizontal surfaces.
Stains and marks are likely to appear quickly on a MicroConcrete floor covered with a matte look sealer.
Applying the Wet Look Protective Sealer
To apply the sealer, you can use a 5 mm short-nap roller, a polyester brush for edges, or a varnish applicator.
- Start by stirring the sealer well, then let it rest for approximately 5 to 10 minutes before application.
- Then, pour the product into a paint tray.

- Always apply the product in thin coats. The goal is to saturate the surface without creating excessive thickness.
- Also, avoid constantly going over the same spot with the roller, otherwise application marks may remain visible once the product is dry.
- Allow to dry for approximately 2 hours between coats, or until the surface is dry to the touch.
IMPORTANT: Do not wait more than 12 hours between sealer coats. Otherwise, the product will harden completely, and the next coat may not adhere properly.
- If necessary, you can perform light sanding between coats with 180 or 220-grit sandpaper to smooth out any imperfections.
- Then apply 2 to 3 coats in total, repeating the same method.
With a little preparation and the right products, it is entirely possible to cover old ceramic tiles with concrete without demolition. MicroConcrete allows you to completely transform a ceramic floor and achieve a modern, durable, and much more contemporary look.
Start your project now!
You will find all the products you need directly on our website.
- Start by measuring your floor dimensions to calculate the quantities you need.
- A 3.5 kg bag covers 35 sq ft for one coat. In other words, for a 35 sq ft floor, you need 2 to 3 bags.
- An 18 kg bucket covers 180 sq ft (one coat).
- Choose the MicroConcrete color you prefer. You can mix different colors if you wish.
- Place your order online and choose between in-store pickup and home delivery.
Would you like to learn more about MicroConcrete and “Concrete Effect” products? Consult our blog dedicated to this topic!
Products found in this article.

MicroBéton Cementitious Coating
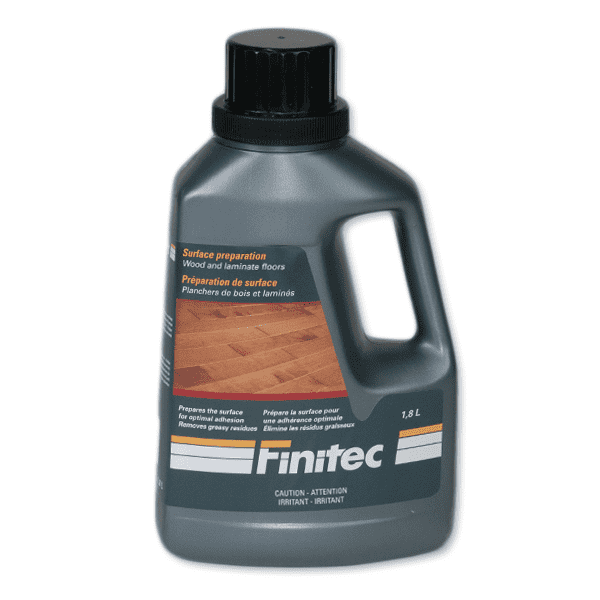
Finitec Surface Preparation

Finitec Protective Sealer
Q&A
Can MicroConcrete crack if my ceramic floor moves?
Yes, this can happen. Before starting, ensure that the tiles are solid and well-adhered. If some are loose, it is best to repair or replace them before covering the surface.
Can a concrete effect be applied to all types of ceramic tiles?
Generally, yes. However, very glossy ceramic tiles may require light sanding to dull them. Also, it is always a good idea to perform a small adhesion test before applying the concrete coating over the entire surface.
Is MicroConcrete resistant enough for a kitchen or entryway?
Yes, provided you apply the Wet Look sealer over it. This sealer will offer better resistance in high-traffic areas such as entryways, kitchens, or corridors.
How long should I wait before walking on the floor?
Even if the surface dries quickly, the product continues to harden for several days.
Generally:
- light traffic: after approximately 24 hours;
- furniture: often 48 to 72 hours;
- full cure: approximately 7 days.
The longer you allow the system to cure undisturbed initially, the more resistant the finish will be in the long term.
Can a heated floor be covered with MicroConcrete?
Yes, but certain precautions must be taken.
Radiant heating must be turned off before and during application to prevent excessively rapid drying. Excessive heat can cause tension in the coating and create microcracks or adhesion problems.
Typically, it is recommended to wait a few days after complete application before gradually turning the heating back on.
What if trowel marks or color variations appear after drying?
This is often normal.
MicroConcrete is a handcrafted decorative finish: trowel marks, nuances, and certain variations are part of the desired concrete look.
However, if certain marks are too pronounced or if an area bothers you visually, it is generally possible to correct everything with light sanding and an additional coat before applying the sealer.


