

The entry door is one of the exterior elements of a home that catches the eye the most. If you want to paint it so it keeps a beautiful look, it’s important to choose a finish that will protect the wood while showcasing its appearance.
Want to give your wood exterior door a premium look? To bring out the full beauty of the wood, go for a finish that highlights its grain and adds a slight sheen. You’ll get an elegant result that gives character to your entryway, all while ensuring lasting protection.
01
The different finishes you'll find on an exterior wood door
Paint
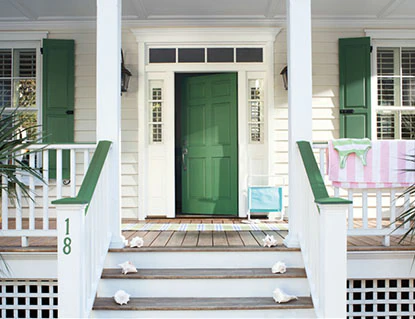
Paint is probably the simplest type of finish to apply on a wood door. It also lets you hide imperfections and give a uniform appearance to a surface that has lost some of its charm. However, it completely hides the wood grain. You therefore lose much of its natural, warm look.
Another drawback to consider: paint forms a film on the surface of the wood and clogs its pores. Over the years, this coating often ends up chipping or peeling, especially if the door is exposed to the elements and temperature changes.
If you choose to paint your entry door, plan on regular maintenance. Once the paint starts to chip, you’ll need to remove the parts that no longer adhere and sand the surface before applying a new finish. It’s an easy solution when it comes to applying it, but it can be more demanding in the long run.
Stain and natural oils

Exterior stain is a very popular option for protecting wood. Hybrid, oil-based, or penetrating stains notably have the advantage of penetrating the wood rather than forming a film on its surface. That’s why they don’t chip or peel the way paint or varnish can. Provided, of course, that the wood has been properly prepared (cleaned and sanded) and that the stain was applied under good conditions.
There is, however, a trade-off to consider. Penetrating stains and natural oils generally have a matte finish. What’s more, they’re not designed to be topped with a varnish. Their resistance actually relies on their ability to let the wood breathe and moisture escape. If you apply a varnish on top, it will likely end up chipping. Moisture could also get trapped in the wood and encourage mold growth.
If you’re looking for a glossy finish that gives your entry door a chic and refined look, penetrating stains and natural oils won’t be the best choice.
Exterior varnish
Exterior varnish, particularly marine varnish, has long been used to finish exterior doors and woodwork. This method made it possible, for example, to apply an interior gel stain or oil-based stain, then protect it all with 2 to 3 coats of marine varnish. You could also keep the wood in its natural state and simply varnish it.
One of the advantages of varnish is that it lets you choose the level of sheen you want. You can achieve a range of finishes, from understated to high-gloss, all while showcasing the wood grain.
The problem is that varnish forms a film on the surface of the wood. Even though it holds up well against the elements, it becomes vulnerable as soon as moisture manages to get underneath that film. Sometimes all it takes is a small hole, a crack, or a poorly coated corner for water to seep into the wood. Moisture can then cause the varnish to lift and the entire finish to chip and peel around the affected area.
That’s why applying an exterior varnish requires careful preparation and special attention to any spots where water could get in.
02
Protecting your wood entry door with a chic, long-lasting finish
Among the latest technologies in exterior wood finishing, Sansin offers a system designed to protect wood while giving it a rich, elegant look: Resolution, made up of Resolution 1 and Resolution 2.
This system was developed for exterior wood surfaces that need extra protection, without losing the material’s natural, warm character. It can even be used in particularly demanding conditions, such as on the woodwork and wood trim of a sailboat, where the coating must withstand intense exposure to the elements and UV rays.
Resolution combines the benefits of a penetrating finish and a marine varnish. It offers great durability while protecting wood against UV rays. Yet it’s neither a classic penetrating stain nor a traditional marine varnish.
What sets it apart is the combination of three elements: the wood, Resolution 1, and Resolution 2. It’s the interaction between these three components that results in a finishing system unlike conventional products.
Resolution I: the first coat

- Clear water-based finishing protector for exterior wood
- Resolution 2 is the second step of the Resolution 1 and 2 system
- Crystal-clear finish that’s harder, more beautiful, and more durable than varnish
- 2 finish options: gloss or satin
As the name suggests, it’s the first coat of the finishing system. It’s an oil-based protector with a high solids content. It works by penetrating deep into the wood to fill the wood pores. Resolution 1 is designed to protect the wood and counteract the negative effects of moisture that can occur on wood surfaces.
Resolution 1 gives the wood the color of your choice. It delivers a vibrant, chic color to your door since it penetrates deep and doesn’t cause the wood grain to raise. Applying Resolution 1 creates a molecular bond between the wood and the product, which prevents the clear protector (Resolution 2) from chipping or peeling the way a varnish might.
Resolution II: the finish

- Clear water-based finishing protector for exterior wood
- Resolution 2 is the second step of the Resolution 1 and 2 system
- Crystal-clear finish that’s harder, more beautiful, and more durable than varnish
- 2 finish options: gloss or satin
- Low odor and easy to apply
Resolution 2 is the system’s surface protector. It forms a barrier that makes the wood water-resistant and protects it against wear caused by scratches and abrasion, as well as against chemical damage. It can notably withstand salt and the various contaminants an exterior door may be exposed to.
It’s the combination of the two products that makes the Resolution system unique. Resolution 1 protects the wood deep down and gives it color, while Resolution 2 provides surface protection. Together, they form a particularly resilient finishing system for exterior wood.
You get the rich, glossy look of varnished wood, without the same risk of chipping and peeling that comes with traditional varnish. The finish also offers more body and shine than a natural oil or penetrating stain.
Sansin’s Resolution 1 and 2 system gives you a rich, long-lasting finish while keeping the risk of chipping and peeling to a minimum.
03
Applying Resolution to your wood entry door
Preparation
As with any exterior staining project, it all starts with good preparation.

The first step is to thoroughly clean the door to remove any trace of dirt, grease, or contaminants that could affect the finish’s adhesion.
- To remove dirt and contaminants, you can use MultiWash or an eco-friendly degreaser.
- Has your door turned grey over time? Use MultiWash at a stronger dilution (5 parts water to 1 part product, or even 2:1). You can also use a cleaner specifically designed to remove greying, such as Sansin’s Wood Wash.
- Are there traces of sap or resin on your entry door? Remove them using a cloth soaked in acetone.
- Then let the door dry completely, ideally overnight.
Sanding the wood door

If your door has already been coated with another finish, you’ll first need to strip the old coating completely to get back down to bare wood.
- Use an orbital or square sander with 80-grit sandpaper.
- Once the old finish has been removed, or in the case of a new door, finish sanding with 100- or 120-grit sandpaper.
- Always sand in the direction of the wood grain and evenly, to avoid marks that could show through once the finish is applied.
- Carefully dust the entire surface using a vacuum or compressed air. There should be no sanding dust left before moving on to product application.
Applying Resolution I to your wood door
This first coat is what penetrates deep into the wood. It ensures the adhesion of the Resolution system and limits the risk of chipping and peeling. Resolution I also gives your door the color you want. The product is available in a choice of 10 elegant colors to showcase the wood grain.

To apply Resolution 1, use a professional-quality universal brush.
- Apply the product generously to fully saturate the wood grain. Let it penetrate for a few seconds, then wipe off the excess with a clean, lint-free cloth.
- Want a darker color? Apply a second coat of Resolution 1 after letting the first one dry for 2 to 4 hours.
- Once application is complete, wait 16 hours before moving on to the next step of the system.
Note: It’s also possible to apply Resolution 1 with a sprayer. In that case, the product needs to be diluted with mineral spirits.
Applying Resolution II to protect your entry door
Resolution 2 is also applied with a professional-quality universal brush. Be careful not to use the same brush as for Resolution 1. Use a clean, separate brush to avoid cross-contaminating the two products and compromising the system’s performance.

Resolution 2 is a finish that builds up through multiple coats. It’s this layering that gives it its exceptional durability and its glossy, refined look. That said, you need to respect the drying times for each step.
First coat of Resolution 2
- Apply a first coat of gloss Resolution 2 using a universal brush.
- Once applied, let it dry for 16 hours.
- Then lightly sand the surface with 220- or 320-grit sandpaper. This step helps soften the texture of the finish.
- Finally, carefully remove the dust with a damp cloth or a vacuum.
Second and third coats of Resolution 2
- Apply the second and third coats, waiting 1 to 3 hours between each one.
- After applying the third coat, let it dry overnight, about 12 to 16 hours.
- Then lightly sand with 220- or 320-grit sandpaper.
- Finally, dust the door again with a slightly damp cotton cloth.
Note 1: You can achieve a completely waterproof finish (<<marin>>-type) with Resolution. To do this, apply 7 to 8 coats of gloss Resolution 2. For a home entry door, applying that many coats usually isn’t necessary.
Note 2: Never mix Resolution 1 and 2! Although Resolution 1 and 2 work together to achieve maximum durability and beauty, the two liquids are not compatible with one another.
04
Weather conditions for applying Resolution
To get an even, long-lasting result, it’s important to follow certain weather conditions when applying the Resolution system.
The ambient temperature should be between 10 and 30°C, while relative humidity should not exceed 50%.
Also avoid applying the product in direct sunlight or during the hottest hours of the day. Excessive heat speeds up the drying of Resolution, making the product harder to spread and potentially affecting the evenness of the result.
Weather conditions need to cooperate before and after application too. The door must not have been exposed to rain in the 24 hours before the project and must stay protected from water for at least 24 hours after application.**
Tip: apply Resolution indoors to avoid any unpleasant surprises!
Do you have an indoor space large enough to work in? If so, finish your door away from the elements. You can even remove the door and set it up in an indoor workspace. This gives you much better control over the application conditions.
Start your project now!
You’ll find all the products you need right on our website.
- Start by measuring your door’s dimensions to know how much product you’ll need.
- Resolution I covers between 150 and 200 sq. ft. (1 coat)
- Resolution II covers between 75 and 100 sq. ft. (3 coats)
- Choose the Resolution color you like.
- Place your order online and choose between in-store pickup and home delivery.
Want to learn more about exterior wood finishing? Check out our blog section that explores this topic!
Products found in this article.

Sansin’s Resolution I
Sansin’s Resolution II

Multi Wash Cleaner
Q&A
Q. What should I do if rain falls on my door before Resolution's drying time is up?
If your door gets wet before 24 hours have passed since application, avoid continuing the project right away. First, let the surface dry completely. Then check whether any marks, whitish patches, or irregularities have appeared in the finish. If so, don’t try to hide them by adding another coat of product. It’s better to sand the surface before applying a new coat.
Q. Can I apply Resolution only to the outside face of my door?
The outside face is obviously the most exposed to the elements, but you shouldn’t neglect the other parts of the door. The edges, top, and bottom can also be exposed to moisture. Proper protection needs to take the entire door into account, not just the surface visible from outside. For the exact requirements of the system on each part, check Sansin’s application guidelines.
Q. How do I avoid drips on a door with moldings and panels?
Doors with moldings, raised details, and panels need a bit more attention. The product can easily pool in corners and recessed areas if applied too generously. Work in small sections and keep an eye on spots where product could build up. With Resolution, it’s important to fully saturate the wood, but also to wipe off or spread out any excess. A buildup of product can lead to a less even result.
Q. Can I do a spot touch-up if the door gets scratched after applying Resolution?
This is a situation that calls for some caution. A touch-up applied only to a scratch can leave a visible difference in color or sheen compared to the rest of the door. Before doing anything, you need to determine whether the scratch only affects the Resolution 2 finish coat or whether it also reaches the wood and the Resolution 1 color coat. The repair won’t necessarily be the same in both cases. If you want to avoid a visible line, it’s best to confirm the right touch-up method before picking up your brush.
Q. My entry door is exposed to the sun almost all day. Will Resolution keep its look for a long time?
Sun exposure affects how all exterior finishes age, even the most durable ones. A door facing south or receiving several hours of direct sunlight may need more frequent monitoring than a door protected by a porch. Periodically check the color and condition of the finish. If you notice color fading or signs of wear, clean thoroughly and sand lightly. Then apply one or two coats of Resolution II to maintain your wood door’s finish.
Q. How long should I wait before reinstalling the handle and closing my door?
Even if the finish feels dry to the touch, it may still be fragile. Avoid handling the door unnecessarily or rubbing the freshly treated surface. Handles, locks, and weatherstripping can come into contact with the finish and leave marks if it isn’t fully dry yet. Follow Sansin’s recommended drying time (at least 24 hours) before reinstalling the hardware and putting the door back into use.


