“Very good product—the 425 ml container allowed me to fill a 1/4″ × 3/8″ crack over a length of 30 feet. It’s easy to apply and becomes very hard once dry; however, the color is white, which stands out a bit on gray concrete.”
Want to repair a concrete floor and not sure where to start? Whether it’s your garage floor, basement, or concrete patio, you’ll need to start by repairing cracks, holes, and eliminating crumbling before you can apply a finish on top.
We explain all the steps to follow to repair your concrete slab durably and avoid unpleasant surprises!
01
Thoroughly Clean the Surface Before Repairing the Concrete

Before you even start repairing your concrete, it’s important to do a thorough cleaning. Otherwise, contaminants on the surface could prevent patching compounds and repair products from adhering properly.
You’ll need a good surface preparation cleaner, and preferably one that also treats efflorescence. Krud Kutter is an excellent product for that.

“Product cleans and degreases surfaces.”
Carmelino, client confirmé
- Start by diluting the Krud Kutter, using a ratio of 6 parts water to 1 part cleaner. If your concrete is very dirty (stubborn stains, heavy efflorescence buildup, etc.), you can also use it undiluted.
- Apply the solution generously to your floor. You can spray it with a sprayer or spread it with a roller.
- Let it work for 3 to 5 minutes. During this time, you can scrub with a stiff brush to loosen the most stubborn dirt. It’s very important that the solution doesn’t dry on the floor, or you’ll have to start over. You can lightly spray water to make sure that doesn’t happen.
- Once that time has passed, rinse with clean water. If the surface you’re working on doesn’t have a drainage system, mop (twice rather than once) to remove soap residue.
After cleaning, let the concrete dry for 24 to 48 hours.
02
First Step: Determine Whether You Need to Repair Your Concrete or Level It
Once the surface is clean, you need to identify what the problem is. The repairs you’ll need to make depend on the condition of the concrete slab.
If your concrete is crumbling at the surface or is constantly dusty, the best thing you can do is level it.
If there are cracks or fissures in your concrete slab, you’ll instead need to do patching work.
We explain how!
03
Leveling Your Concrete Slab
If you want to level your concrete slab, you’ll need to start by doing a thorough grinding of the surface. The goal isn’t necessarily to remove a large amount of concrete, but rather to eliminate the softer or damaged concrete at the surface that tends to crumble. This will also create a profile and allow the products you apply on top to adhere durably.
The tool of choice for this job is a grinder with diamond heads. Diamond heads are the most effective for scarifying concrete—without wearing out your arm sanding—and making the concrete rough enough to promote adhesion of the leveling product.
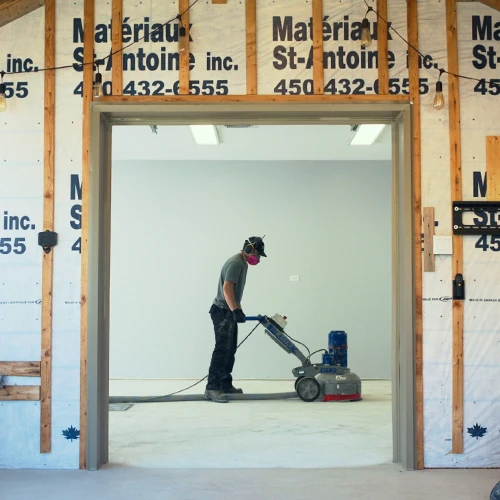
- If you’re working indoors, remember to isolate the room well, or concrete dust could spread throughout your house. Use plastic tarps to seal off the room where you’re grinding.
- Work methodically, covering the entire surface. Let the grinder do the work and don’t try to go too fast: that could leave marks in your concrete if you move it abruptly.
- Pay particular attention to areas where paint, glue, or stubborn residue remains. However, avoid unnecessarily gouging the concrete: the goal is to obtain a sound, uniform surface, not to further alter the slab’s profile.
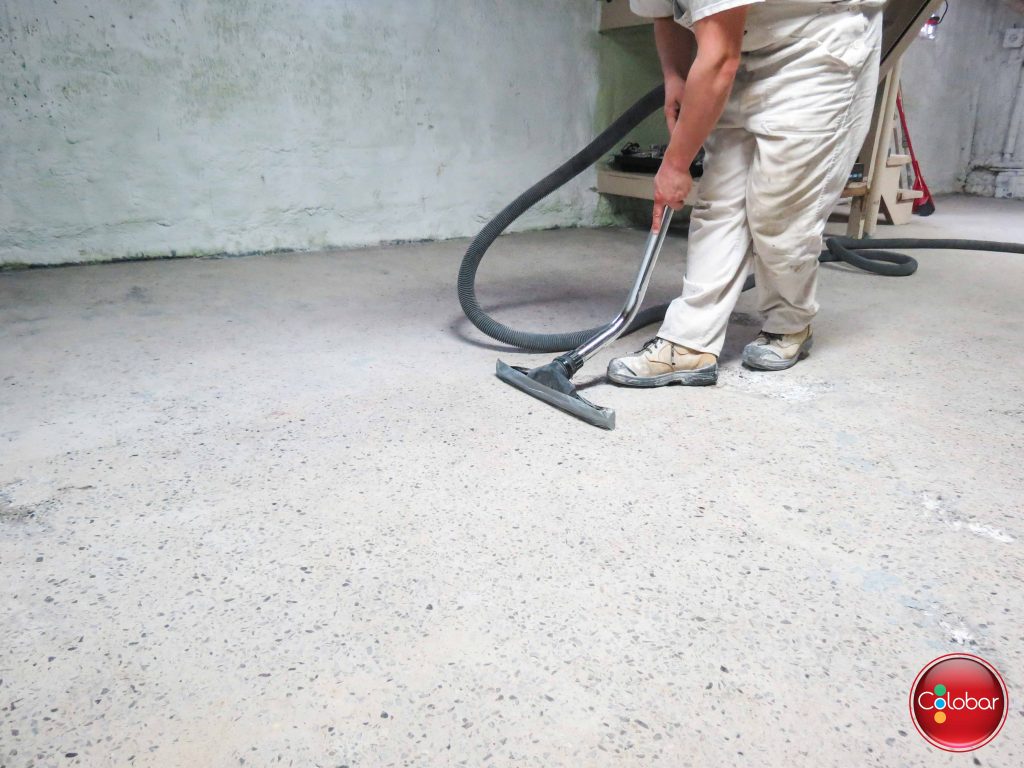
- Then make sure to remove all traces of dust with a shop vacuum equipped with a fine-dust filter. Go over corners and cracks (if there are any) to be sure you’ve removed everything.
Leveling Your Concrete Slab with Resurfacing Cement or a Repair Compound
Once the surface is ground and perfectly dust-free, you can move on to leveling or resurfacing.
The most economical option is to use bags of resurfacing cement, which you can easily find at big-box stores.
While it’s the option that will cost you the least, it does have some drawbacks:
- The bags are heavy to carry and you’ll need to store several at home.
- You have to mix it yourself, and if you’re not used to pouring cement, there’s a risk that your mix won’t be ideal and the cement, once hardened, will be softer and more prone to crumbling.
If you’re willing to spend more and looking for the simplest option to execute, you can opt for the TurboKrete repair compound.
Rust-Oleum’s TurboKrete allows you to work directly on the concrete to obtain a stronger, more uniform surface before applying the final coating.
- Start by mixing the contents of the bucket. Use a paint mixer. First stir components A and B, then mix them together. Next, add component C (the aggregate). Add the aggregate gradually (not all at once), and mix until you achieve a homogeneous texture.
- Using a trowel, spread the TurboKrete, gradually stretching it to reach the desired level. Work with a straight edge or a sufficiently long trowel to regularly check the level. The goal is to eliminate height differences without creating new bumps.

- Pay particular attention to transitions between sections to obtain the most uniform surface possible.
- TurboKrete hardens in about 30 minutes. You therefore need to work methodically and avoid preparing a larger quantity than you can apply in the available time.
- Let it dry for 2 to 4 hours before applying a finish on top. After 6 to 8 hours, you can resume heavy use of the surface.
Once the product is sufficiently hardened, check again whether the slab is level enough. If needed, light grinding will correct small high spots and provide a uniform surface before moving to the next step of the project.
04
Fill cracks
If your concrete is cracked, it’s crucial that you repair the cracks before applying a coating. The goal is to completely fill the crack and obtain a surface uniform enough to apply a finishing product.
For a crack less than one centimeter wide, Passeport Elite concrete crack patching epoxy is an excellent option.
A) Open the Crack
- Start by slightly opening the crack using a concrete grinder. The goal is to eliminate the friable parts around the crack and create a more stable surface for the patching epoxy.
No need to remove a large amount of concrete. The goal is simply to remove parts that are no longer sufficiently solid and obtain clean, stable edges.
B) Thoroughly Remove Dust
Grinding will generate a lot of dust. You therefore need to take the time to thoroughly clean the crack and its surroundings before applying the product.
Use a shop vacuum to remove all the dust in the crack. This step may seem trivial, but it’s essential: if dust remains in the gap, it can prevent the epoxy from adhering properly to the concrete.
C) Apply the Patching Epoxy
Passeport Elite patching epoxy is a two-component product. You therefore need to mix the two parts together before application.
- Mix the two components until you obtain a perfectly homogeneous color and texture. Once mixed, the product has a fairly thick consistency, comparable to that of petroleum jelly. This texture allows you to work it easily with a trowel.
- Avoid preparing too large a quantity at once. As with any two-component epoxy, the product begins to react as soon as the two parts are mixed.
- Using a trowel, push the patching epoxy directly into the crack. Work along the crack, applying enough pressure to force the product into the gap.
- The goal is to completely fill the crack, not just cover its surface. Therefore, take the time to work the epoxy into the full accessible depth. If the crack is deeper than 1/4″, it may be a good idea to fill the excess depth with sand.
- Once the crack is filled, run the trowel over the surface to remove excess and bring the product level with the floor. The flatter the repair, the less work you’ll have to do afterward.
Once application is complete, let the patching epoxy harden for about 6 hours before continuing work.
Hardening time can vary depending on ambient conditions, particularly temperature. Therefore, avoid working too quickly on a repair that isn’t completely hardened.
D) Check the Repair Before Continuing
Once the epoxy has hardened, run your hand over the repair and verify that it’s level with the surrounding concrete.
If a slight high spot remains, you can sand it to obtain a perfectly uniform surface. Then vacuum up all the dust produced by sanding.
The repair is now ready to receive the rest of the system, whether it’s a leveling product, an epoxy finish, or a floor paint.
A well-prepared and properly patched crack allows you to start fresh on a sound, uniform surface before continuing your project.
Start your project now!
You will find all the products you need directly on our website.
- Start by measuring the dimensions of your shower to calculate the quantities you need.
- Determine whether you need to level your concrete slab or repair cracks (or both!).
- To level an entire floor, it’s preferable to use a repair compound like TurboKrete.
- For cracks, use a patching epoxy.
- Place your order online and choose between in-store pickup and home delivery.
Want more advice on how to refinish or protect a concrete floor? Check out the section of our blog dedicated to epoxy!
Products found in this article.

TurboKrete Concrete Repair Compound

Crack filling epoxy for concrete

Stainless Steel Trowel
Q&A
Q. Will a repair prevent the crack from coming back?
In many cases, the repair will solve the problem. However, if the crack is caused by a concrete slab that’s moving, a surface repair may end up cracking again. Before repairing it, you therefore need to try to understand why it appeared. Concrete that’s moving requires a different approach than a simple shrinkage crack.
Q. What should I do if the concrete continues to crumble after the repair?
If the concrete around the repair remains friable, avoid applying a new coating directly. The problem then comes from the substrate itself. You need to remove parts that aren’t solid with thorough grinding and make sure you have a sufficiently strong base before applying a finishing product.
Q. Can you repair a concrete floor that constantly produces dust?
Recurring dust is often a sign of efflorescence, that the concrete surface is too friable, or that it wasn’t properly prepared. If the surface continues to produce dust after vacuuming, you need to treat the substrate before applying a finish. It’s important that you use a masonry cleaner or primer that neutralizes efflorescence.
Q. Why is my repair still visible after applying the finish?
If you still see the repair once the paint or epoxy is applied, it’s generally because the surface wasn’t perfectly uniform before finishing. A high spot, a difference in texture, or a slight depression can become much more visible with certain coatings. If you notice a difference before painting, it’s better to correct it right away rather than hope the finish will hide it.
Q. Can I apply a coating directly after repairing the concrete?
Not necessarily. Before moving to the finish, make sure the repairs are completely hardened and the surface is clean and dust-free. You also need to check the recommendations of the repair product used, since the delay before recoating can vary from one product to another. If you apply your coating too quickly, you risk compromising its adhesion and durability.
Q. What should I do if the concrete is damp after making repairs?
If you still see the repair once the paint or epoxy is applied, it’s generally because the surface wasn’t perfectly uniform before finishing. A high spot, a difference in texture, or a slight depression can become much more visible with certain coatings. If you notice a difference before painting, it’s better to correct it right away rather than hope the finish will hide it.