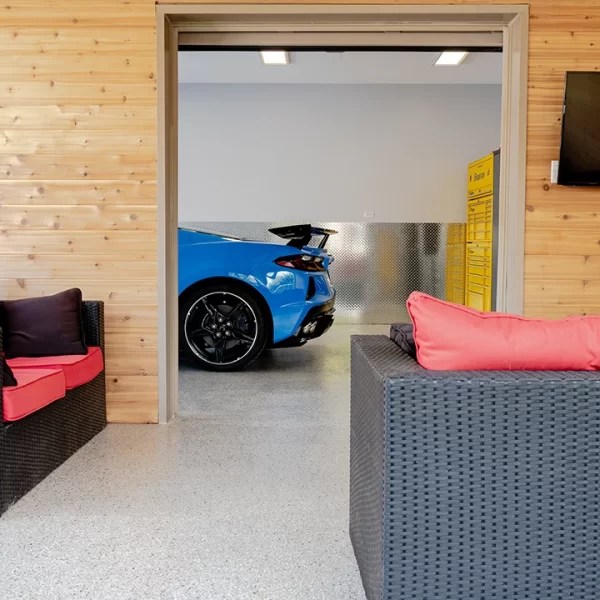
Has your epoxy floor lost its shine or become covered with scratches over the years? Despite epoxy’s high durability, sand, rocks (or gravel) and heavy objects can leave marks on the surface and affect the finish. Fortunately, there are simple, effective solutions to prevent this damage and restore the coating’s appearance.

01
How to repair your epoxy floor and how to prevent scratches
To ensure the longevity of an epoxy floor, the best strategy is regular preventive maintenance.
We recommend sweeping or vacuuming frequently to remove sand, dust, dirt and small rocks that can end up on your floor. With back-and-forth traffic, these particles will create abrasion on your epoxy floor, and that friction is what will dull the shine and cause scratches over time.
Does your epoxy floor need a repair boost?
Even if you take good care of it, your epoxy floor can eventually show signs of wear. Fortunately, there are simple solutions to restore its appearance and shine.
You have three options:
- Apply a new coat of clear epoxy to restore the surface and make it look like new again.
- You can also apply a polyaspartic for even greater resistance than 100% solids epoxy.
- Apply a restorative and protective sealer to revive the finish, bring back the floor’s shine, and protect it from everyday wear.
02
Apply a coat of clear epoxy to your floor

“Product already tried and I am completely satisfied. A special word for the technician I spoke with for the excellent service.
Gaétan Jalbert, client confirmé
Order delivered quickly, thank you! ”
By applying a coat of 100% solids epoxy, you cannot go wrong. It is a good compromise between ease of application, price, and finish durability. However, it does require preparation and a bit of technical skill.
First of all, keep in mind that good preparation is essential if you want results that will last over time.
- Start by thoroughly cleaning the floor using a cleaner-degreaser such as Krud Kutter, then rinse the surface thoroughly.
- Once the floor is completely dry, do a light sanding with 120-grit sandpaper. The goal is to degloss and remove the shine from the floor. That way, the new coat will adhere more effectively.
- Then remove the sanding dust by vacuuming or wiping with a cloth.
Now that the surface is prepared, you can apply the maintenance coat.
- Mix the resin and activator with a paint mixer and an electric drill; mix for 2 1/2 to 3 minutes at medium speed (about 450 rpm).
- When the mix is ready, pour the epoxy right away, making ribbons on the floor.
- Spread the epoxy using a squeegee. Then level the coat with a 10 mm roller. If you have a small surface (300 sq ft or less), you can spread the epoxy directly with the roller.
- Let it cure for 24 hours before allowing light traffic on the floor.
If applying a two-component coating does not intimidate you, 100% solids clear epoxy is an excellent choice for maintaining your scratched floor.

03
Apply a coat of polyaspartic for better scratch resistance

Price per sq ft: $0.75
Passport Elite 98% Solids Polyaspartic is an ultra-resistant, fast-curing polyurea coating. Designed for demanding environments, this polyaspartic offers exceptional chemical and UV protection, both indoors and outdoors. Ideal for floors, sidewalks, balconies, or high-traffic areas.
Featured Product
Estimated delivery: 2-3 business days
In-store pickup available
Some professional contractors choose an epoxy-urethane or polyaspartic-based coating instead. It is a type of two-component coating that is very similar to epoxy, but offers better resistance to scratches, wear and yellowing.
Its downside? Polyaspartic is more difficult to apply because it cures faster. So you have less time to spread it, and it is important to be well organized because every movement counts.
- Mixing is essentially done the same way as for epoxy: add the hardener to the resin and mix for about 3 minutes at low speed (450 rpm).
- The main difference is that polyaspartic can remain in the pail for up to 45 minutes. However, once you pour it on the floor, it cures very quickly. So be sure to mix only the amount you will be able to apply within about 20 minutes.
- Spread the polyaspartic with a squeegee.
- Go over it with a roller to level the coat.
- Let it cure for 24 hours before allowing light traffic on the floor.
Polyaspartic is the deluxe option: it costs more, it is harder to do, but it is what will give you the finish that will stay looking good the longest.
04
Repair your epoxy floor easily with a protective sealer

“Excellent product, I applied it with a roller using the cross-rolling method. Excellent results, very good service at Colobar.”
Marco Dumoulin, client confirmé
Good news for you: you can now find single-component products (so no mixing or catalyzing) that combine adhesion and resistance properties to be applied on an epoxy floor.
100% single-component polyurethane protective sealer
The Passeport Élite Epoxy Protection & Maintenance Coat was specially designed to restore shine to epoxy floors that have lost their luster or that are scratched.
Thanks to its high-performance polyurethane resin, this sealer offers excellent scratch resistance and helps protect your floor from everyday wear. Because it is water-based, it is easy to apply, odor-free and dries quickly.
This protector is part of a new generation of products for epoxy floor maintenance. It replaces older repair methods by offering a simpler, more accessible solution.
- Start by mixing the sealer with a very clean wooden stick. Stir vigorously for 45 seconds, then let it rest for about 10 minutes so the bubbles can disappear.
- Pour the finish into a paint tray.
- You can apply the Epoxy Protection Coat with a 10 mm roller, a Finitec varnish applicator, or a brush.
- Start by cutting in around your floor with a brush or a varnish applicator.
- Soak your roller generously, then choose a section of about 4’x4′ of the floor. Place the roller in the middle of this imaginary area (you can also mark it off with painter’s tape if you want), then cover the entire section with a back-and-forth motion, always starting from the center.
- Then go back in the opposite direction to avoid roller marks and streaks.
- Start a new section, overlapping the two by about 6”. Continue this way until the entire floor is covered.
- Let dry for about 3 to 4 hours.
- For the smoothest finish possible, sand with 180-grit paper. Then remove the sanding dust with a slightly damp cloth.
- Apply a second coat the same way.
Want a slightly glossier finish and maximum resistance? Apply a 3rd and 4th coat! Be careful, however, not to wait more than 24 hours between coats, otherwise it can affect adhesion.

Key features of the Passeport Élite Protection Coat:
- 100% polyurethane resin
- supreme resistance: increases resistance to abrasion and impact
- improves surface hardness
- acts as a dust-proofing product
- ready-to-use (1 component)
- easy to work with and apply
- fast drying
- full cure in 7 days
- easy maintenance
- low, non-irritating odor
- low VOC content (272 g/L)
Recommended uses:
- residential: vehicle-free garage floors, basement floors, loft floors, and concrete countertops coated with epoxy
- commercial: restaurant floors, retail store floors, shopping malls, offices, and hotels
- indoor use only on epoxy-coated surfaces
Not sure which product to choose? We made a chart to help you!
| Product | Benefits | When to use it? |
|---|---|---|
| 100% solids clear epoxy |
|
When your floor is very worn, scratches are numerous, or you want to completely redo the topcoat. Suitable for DIYers who are comfortable applying a two-component product. |
| Epoxy urethane (polyaspartic) |
|
Ideal for garages, workshops, and other spaces subject to heavy use. Due to its very fast drying time, this product is generally applied by a specialized contractor. |
| 100% single-component polyurethane protective sealer |
|
Perfect if your floor is still in good condition but has lost its shine or has light scratches. Ideal as preventive maintenance to extend the life of the coating. |
Start your project now!
You will find all the products you need directly on our website.
- Start by measuring the dimensions of your epoxy floor to calculate the quantities you need.
- 100% solids epoxy is available in three sizes:
- Small kit (4.5 L): covers 250 sq ft
- Medium kit (8.5 L): covers 400 sq ft
- Large kit (12 L): covers 600 sq ft
- The polyaspartic kit covers 400 sq ft
- One gallon of Passeport Élite Epoxy Protection & Maintenance Coat covers 800 sq ft.
- 100% solids epoxy is available in three sizes:
- Choose the finish that best suits your project.
- Place your order online and choose between in-store pickup and home delivery.
Want more tips and advice for your epoxy project? Check out the section of our blog dedicated to this topic!
Products found in this article.
Epoxy Protective and Maintenance Coat

Passeport Élite 100% solids epoxy
98% solids industrial polyaspartic
FAQ
Q. How do I know if my epoxy floor needs to be restored or completely redone?
It all depends on the condition of the current coating. If the epoxy is still solid and it is mainly a loss of shine or small wear marks, a restoration can often be enough.
However, if you notice areas that are peeling, major cracks, or damage that reaches the substrate under the epoxy, a more extensive intervention may be necessary.
A proper assessment before starting the work helps avoid choosing a solution that does not address the real problem.
Q. Can I apply a restoration product on an old epoxy floor?
Yes, but the surface must be properly assessed beforehand. A restoration product only works if the existing coating is still well bonded.
Some contaminants such as maintenance products, waxes, or silicone residues can affect adhesion. That is why proper surface preparation is always an important step.
If in doubt, doing a small test in an inconspicuous area is a good way to validate the result before treating the entire floor.
Q. Will a new protective coat make all scratches disappear?
A new protective coat can greatly improve the floor’s appearance, but it does not necessarily hide all damage.
Superficial scratches and loss of shine can be corrected effectively. However, deep marks, impacts, or defects in the existing coating must be addressed before applying a new coat.
Preparation is often the step that makes the difference between an acceptable result and a truly durable finish.
Q. How long can an epoxy floor keep its appearance?
The lifespan of an epoxy floor depends mainly on how it is used and maintained.
A garage used daily with vehicles, tools, and lots of traffic will naturally be more demanding than a less frequented residential space.
The best way to extend its lifespan is to intervene before wear becomes too advanced. A small preventive restoration can avoid a full redo later on.
Q. Why do some epoxy floors become dull over time?
Even a very durable coating is affected by everyday use. Abrasive dust, small rocks, moving heavy objects, and certain cleaning products can gradually reduce the finish’s shine.
It is a bit like a car’s paint: it stays beautiful much longer when it is protected and maintained with the right products.
Q. How do I choose the right product to restore my epoxy floor?
The best choice depends on three factors: the current condition of your floor, how the space is used, and the level of protection you are looking for.
A residential garage, a workshop, or a commercial space will not necessarily have the same needs. Some projects require a new coating layer, while others can be handled simply with a protective restoration product.
If you are hesitating between several solutions, come see us. We can help you choose the product that truly matches your project.