


Description
100% solids industrial epoxy for concrete floors
Product description
Description:
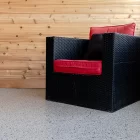
Passeport Élite industrial epoxy is the ideal solution for those who want to turn a concrete floor into a durable, clean, resistant surface—without compromise. Thanks to its 100% solids formula, solvent-free and odour-free, it applies easily, even in enclosed spaces like a garage, warehouse, or commercial kitchen. From the first coat, you will notice the difference: no overpowering odour, no harmful emissions—just an ultra-resistant glossy finish that looks professionally done.
Designed for contractors, experienced DIYers, and meticulous homeowners, this floor epoxy is for those who do not want to redo their floor every two years. It resists abrasion, chemicals, moisture, and bacteria. Its dense surface prevents dirt from penetrating and makes cleaning easier—essential in active environments like garages or mechanical rooms.
Covering a large area? This 3-gallon size is perfect. Worried about mixing it wrong? Follow the 2:1 ratio, mix in small batches, and use everything within 30 minutes of preparation. With these few precautions, you will get a professional, even, long-lasting result for years. Passeport Élite is the epoxy we recommend to those who want to get it right the first time.
Features
- 100% solids formula, solvent-free and odour-free
- Approved finish by the Canadian Food Inspection Agency.
- Superior adhesion on concrete and other substrates
- VOC-free, safe for interior applications
- Economical size 3 gallons – covers up to 600 ft²
- Dense surface resistant to bacteria and moisture, and easy to clean.
Uses:
For concrete floors. Not recommended for outdoor plywood decks, as the coating will peel due to the moisture absorbed by this type of unstable material.
Industrial maintenance, commercial areas, light industry, heavy industry, metal industry, warehouses, car dealerships, wastewater treatment plants, light industry, mechanical rooms, chemical processing, dairy industry, classrooms, electronics, garage, animal shelter, commercial kitchen, pharmaceutical industry, pulp and paper industry, pool, bakery, brewery, operating room, kitchen, meat processing lab, etc.
Coverage:
Covers 600 ft² per 3-gallon kit.
For a second, thicker coat, the kit will cover approximately 450 sq ft.
For a metallic color, the 3-gallon kit must be applied to 150 sq ft.
Drying time:
- 24 h between coats.
- Once the 2 components are mixed, you have 30 min to apply before the epoxy hardens.
Pro tips:
- Mix only the amount of epoxy you can apply within 30 min. Otherwise, you will lose the excess product since it hardens and becomes unusable.
- Follow the 2:1 mixing ratio precisely. Otherwise, epoxy curing issues may occur (epoxy that cures too fast, epoxy that never cures).
- When mixing the 2 components, scrape the sides and bottom of the container with a spatula. This ensures the entire mix is properly proportioned.
- Do not apply on a floor with a moisture level of 4% or higher. Ambient humidity must be below 85% during application.
- For optimal application, spread the epoxy with a squeedgee (rubber squeegee) for epoxy, then even out the finish using an 18″ lint-free roller.
Available colors
Available colors
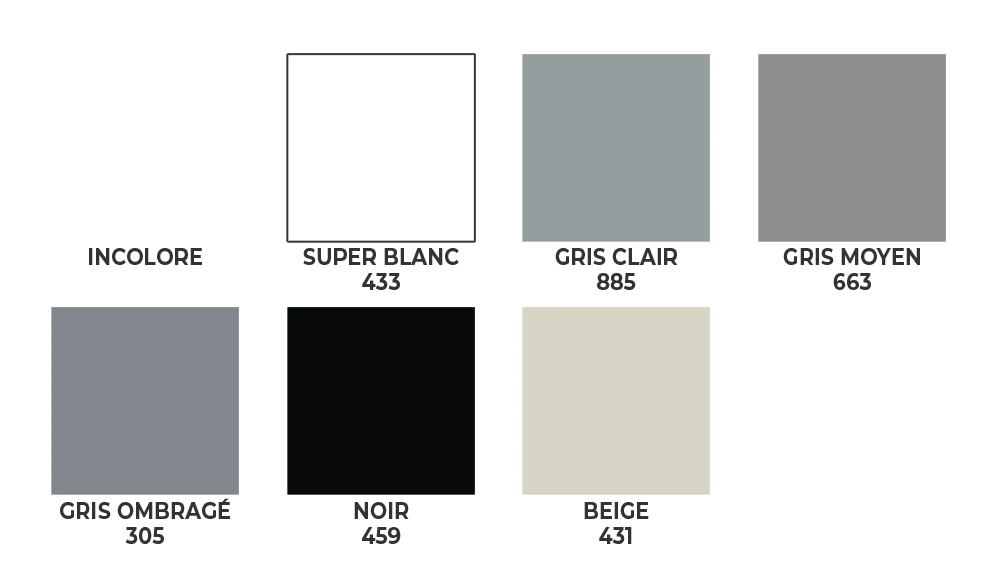
* Colours shown may vary depending on your screen.
How to apply
How to apply
See how to apply 100% solids epoxy

How to apply 100% solids epoxy
Preparation:
The product must be applied to a clean, dry surface, pre-sanded with a diamond-head grinder.
- Clean with a degreaser, then let the floor dry completely (24 to 48 h).
- Sand using a diamond-head grinder.
- Remove dust using a vacuum.
It is important that no sanding dust remains. Vacuum twice rather than once.
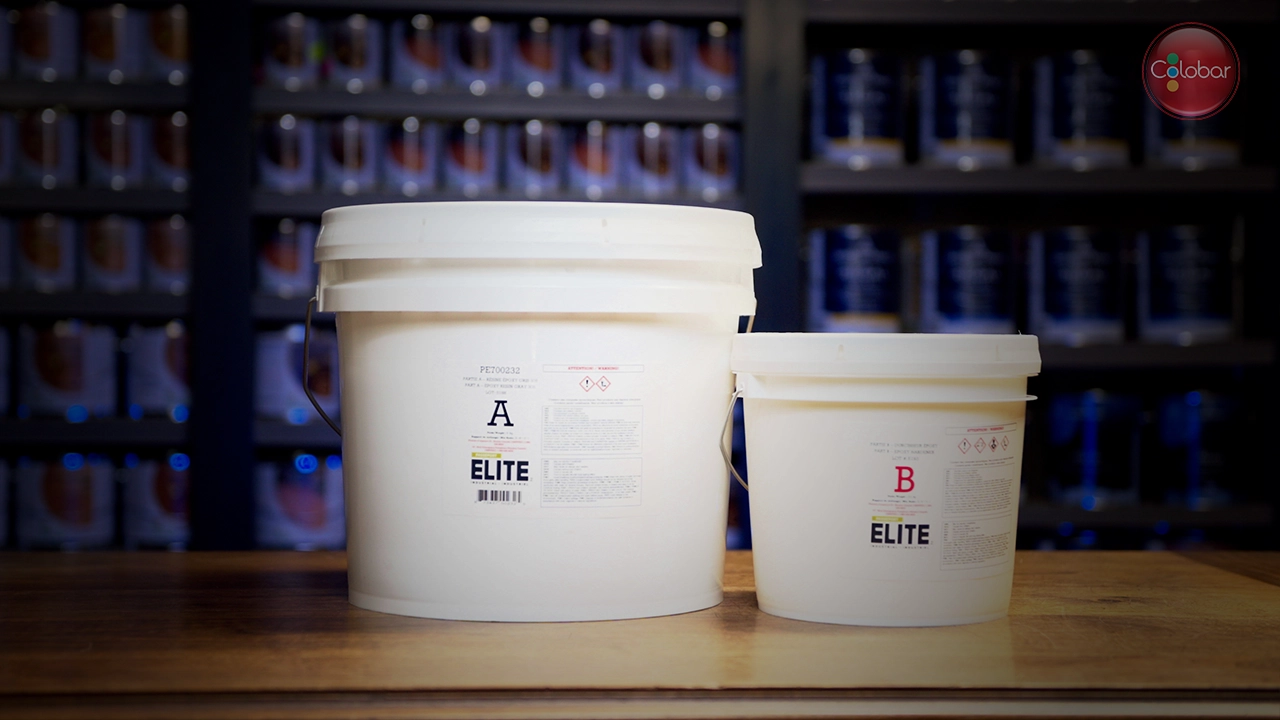
Mixing:
You must mix components A and B to activate the epoxy.
- Attach a paint mixer to the end of a power drill.
- Mix for 4 minutes at medium speed (approx. 450 rpm).
- After 2 minutes of mixing, scrape the sides of the container with a spatula or wooden stick. It is very important that all of the resin mix with the activator.
- Pour the epoxy onto the floor immediately after mixing.
Note: Once mixing is complete, you have 30 min to apply the epoxy.
Application:
Pour the epoxy onto the surface to spread it out.
- First, pour a bead of epoxy around the perimeter of the room and cut in by simply pushing to the wall with a brush.
- Pour the epoxy in strips over the first half of the floor and spread evenly with a squeegee.
- Then use a 10 mm roller to spread the epoxy evenly over the floor.
- Then complete the second half the same way.
- If you want an epoxy with flakes, you must broadcast the vinyl flakes within 20 minutes of application. Broadcast the flakes by hand, tossing them upward.
Let dry for 24 h before applying a 2nd coat, following the same steps.
FAQ – Frequently asked questions
Q: Is this epoxy odour-free?
Yes, it contains no solvents or VOCs. Perfect for indoor spaces.
Q: Is it resistant to chemicals?
Yes, it offers excellent chemical and mechanical resistance. Ideal for garages, workshops, or commercial kitchens.
Q: How long do I have to apply it once mixed?
About 30 minutes. Prepare only what you can apply within that time.
Q: Do I need a primer before application?
Not necessarily, but mechanical concrete preparation is essential to ensure good adhesion.
Q: What is the coverage of the 3-gallon kit?
Up to 600 ft² depending on the surface and applied thickness.
Q: Can you walk on it soon after application?
We recommend waiting 24 h before walking on it and 72 h before driving a vehicle on it.
Q: Can it be applied in a basement?
Yes, if the moisture level is below 4% and ambient humidity is under 85%.


Maude Bouchard (verified owner) –
Superbe produit! Tellement facile à utiliser. Nous sommes vraiment satisfait du résultat obtenu grâce à ce produit plus que parfait!
André Bertrand (verified owner) –
Véritablement de qualité industrielle
laurent (verified owner) –
Bon produit, belle finition et service impeccable
Johanne clement (verified owner) –
C’était facile comme produit, simple a comprendre beau finit!
Johanne clément (verified owner) –
Très beau résultat! Parfait pour un sous, zéro entretien!